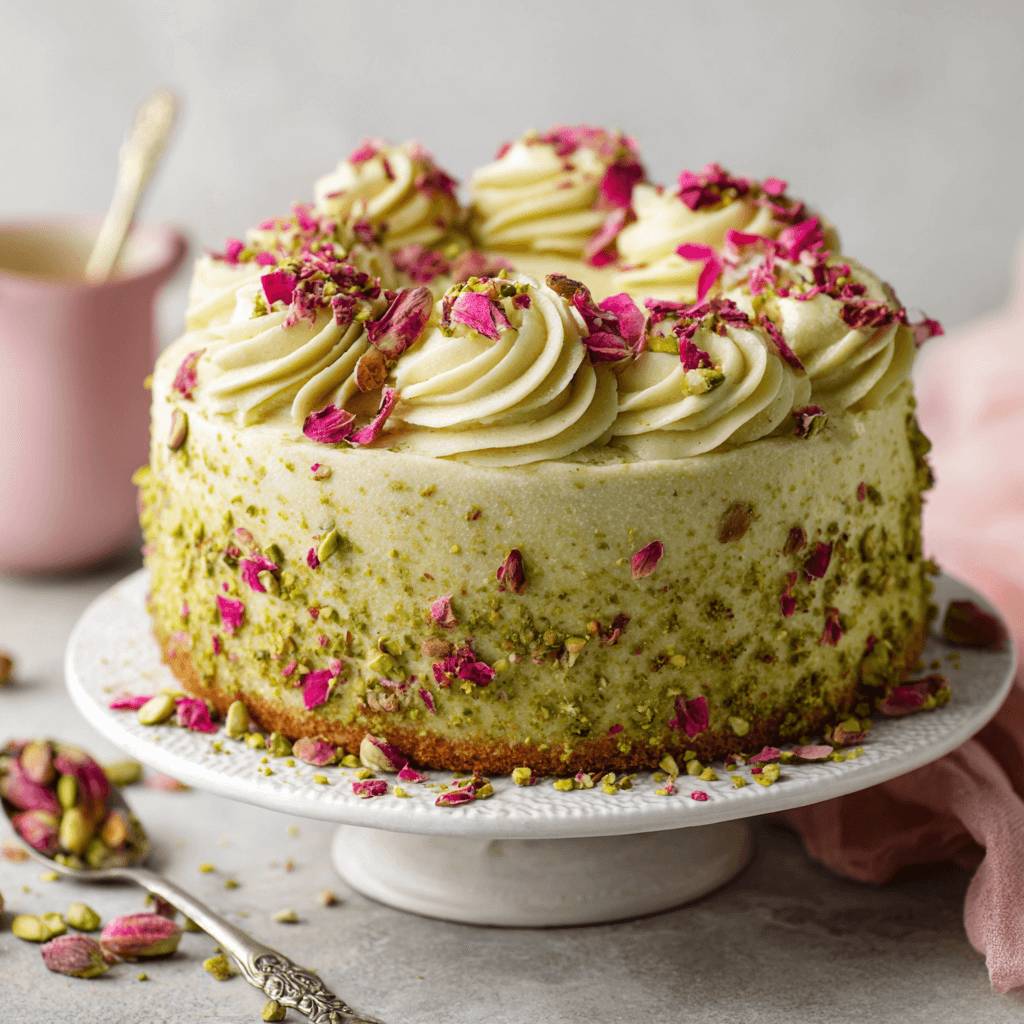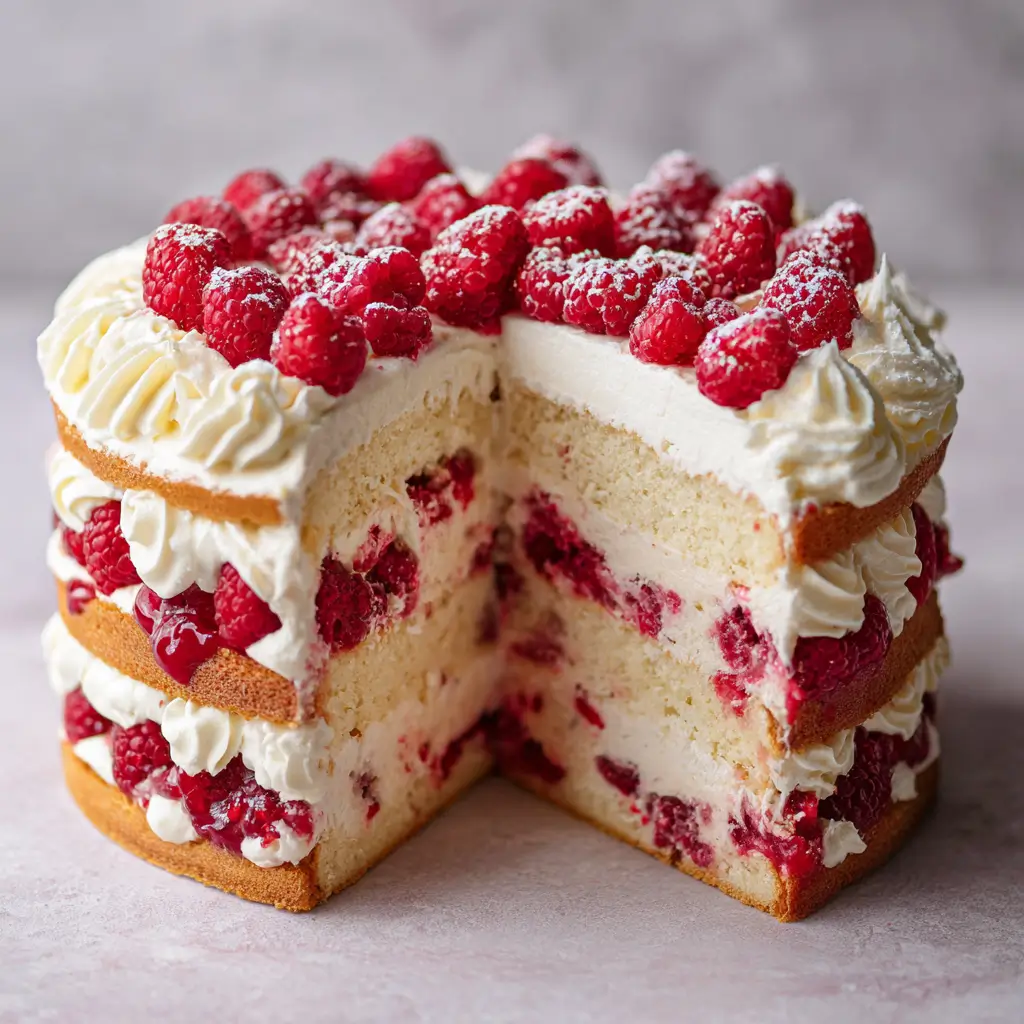
Are you looking for a show-stopping dessert that combines elegance with delightful flavors? What if I told you that a single cake could be the centerpiece of your next celebration? Enter the Delicious Raspberry-Filled Celebration Cake, a stunning dessert that features layers of light, fluffy vanilla sponge cake filled with luscious raspberry jam and fresh raspberries. This cake is not only visually appealing but also bursts with flavor, making it a perfect choice for birthdays, anniversaries, or any special occasion. Let’s explore how to create this delightful masterpiece!
Ingredients List
To make the Delicious Raspberry-Filled Celebration Cake, you will need the following ingredients:
For the Cake:
- All-purpose flour (2 cups)
- Granulated sugar (1 ½ cups)
- Baking powder (2 ½ teaspoons)
- Salt (½ teaspoon)
- Unsalted butter (½ cup; softened)
- Eggs (3 large)
- Milk (1 cup; whole milk is preferred)
- Vanilla extract (2 teaspoons)
For the Filling:
- Fresh raspberries (2 cups)
- Raspberry jam (1 cup)
For the Frosting:
- Unsalted butter (1 cup; softened)
- Powdered sugar (4 cups)
- Heavy cream (2 tablespoons)
- Vanilla extract (1 teaspoon)
For Garnish:
- Fresh raspberries (for decoration)
- Mint leaves (for decoration)
Substitutions:
- Use almond flour or gluten-free flour for a gluten-free version.
- Substitute strawberry jam or other fruit jams if raspberries are not available.
Step-by-Step Instructions
Step 1: Prepare the Cake Batter
- Preheat your oven to 350°F (175°C). Grease and flour two 9-inch round cake pans.
- In a large mixing bowl, whisk together the all-purpose flour, baking powder, and salt.
- In another bowl, cream together the softened butter and granulated sugar until light and fluffy, about 3-4 minutes.
- Add the eggs, one at a time, mixing well after each addition. Stir in the milk and vanilla extract.
- Gradually add the dry ingredients to the wet ingredients, mixing until just combined.
Step 2: Bake the Cakes
- Divide the batter evenly between the prepared cake pans.
- Bake in the preheated oven for 25-30 minutes, or until a toothpick inserted into the center comes out clean.
- Once baked, remove the cakes from the oven and let them cool in the pans for 10 minutes. Then, transfer to a wire rack to cool completely.
Step 3: Prepare the Raspberry Filling
- While the cakes are cooling, prepare the filling by combining fresh raspberries and raspberry jam in a bowl. Gently mash the raspberries with a fork to create a chunky filling.
Step 4: Make the Frosting
- In a mixing bowl, beat the softened butter until creamy.
- Gradually add the powdered sugar, mixing on low speed until combined. Add the heavy cream and vanilla extract, then beat on high speed until fluffy and smooth.
Step 5: Assemble the Cake
- Once the cakes are completely cooled, place one layer on a serving plate. Spread the raspberry filling evenly over the top.
- Place the second cake layer on top of the filling.
- Use the frosting to cover the top and sides of the cake, smoothing it out with a spatula.
Step 6: Garnish and Serve
- Decorate the top of the cake with fresh raspberries and mint leaves for a beautiful presentation.
- Slice and serve chilled or at room temperature. Enjoy your delicious creation!

Nutritional Information
Here’s a quick overview of the nutritional content per serving (based on 12 servings):
| Nutrient | Amount per Serving |
|---|---|
| Calories | 320 |
| Protein | 3g |
| Carbohydrates | 45g |
| Dietary Fiber | 1g |
| Sugars | 25g |
| Total Fat | 15g |
| Saturated Fat | 9g |
| Sodium | 200mg |
Healthier Alternatives for the Recipe
If you want to make your Delicious Raspberry-Filled Celebration Cake healthier, consider these modifications:
- Reduce sugar by using less jam or a sugar substitute.
- Incorporate whole wheat flour for added fiber and nutrients.
- Use Greek yogurt in place of some butter in the frosting for a lighter option.
Serving Suggestions
To elevate the presentation and enjoyment of your cake, consider these serving suggestions:
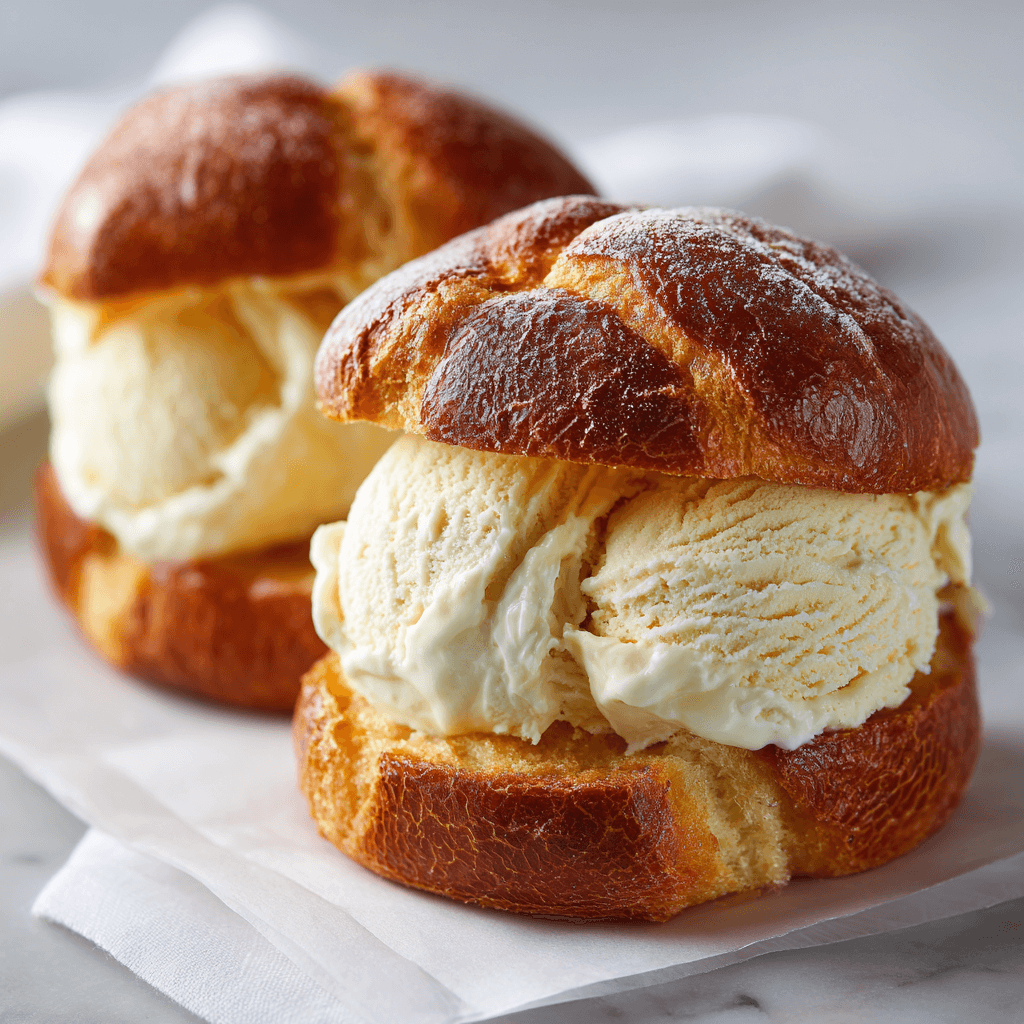
- Serve with a scoop of vanilla ice cream or whipped cream for added indulgence.
- Pair with a cup of tea or coffee for a delightful afternoon treat.
- Create a dessert platter with sliced fruits and cookies for a beautiful buffet display.
Common Mistakes to Avoid
- Not letting the cakes cool completely: Ensure the cakes are fully cooled before frosting to prevent melting.
- Overmixing the batter: Mix until just combined to keep the cake light and fluffy.
- Skipping the raspberry filling: This is a key component that adds moisture and flavor—don’t skip it!
Storing Tips for the Recipe
To keep your Delicious Raspberry-Filled Celebration Cake fresh:
- Store leftovers in an airtight container in the refrigerator for up to 3 days.
- For longer storage, you can freeze individual slices. Wrap them tightly in plastic wrap and foil, and consume within 2 months.
- Thaw in the refrigerator before serving if frozen.
Conclusion
In conclusion, the Delicious Raspberry-Filled Celebration Cake is a stunning dessert that combines the sweetness of raspberries with the richness of cheesecake flavors. Perfect for any celebration, this cake is sure to impress your guests and leave them wanting more. We invite you to try this recipe, share your feedback in the comments, and subscribe for more delightful dessert ideas!
FAQs
Can I use frozen raspberries?
Yes, you can use frozen raspberries, but make sure to thaw and drain them before using to avoid excess moisture.
How can I make this cake ahead of time?
You can bake the cake layers in advance and store them wrapped in plastic wrap in the refrigerator for up to 2 days before assembling.
Is this cake suitable for gluten-free diets?
Yes, simply substitute the all-purpose flour with a gluten-free flour blend.

Delicious Raspberry-Filled Celebration Cake
Ingredients
- For the Cake:
- All-purpose flour (2 cups)
- Granulated sugar (1 ½ cups)
- Baking powder (2 ½ teaspoons)
- Salt (½ teaspoon)
- Unsalted butter (½ cup; softened)
- Eggs (3 large)
- Milk (1 cup; whole milk is preferred)
- Vanilla extract (2 teaspoons)
- For the Filling:
- Fresh raspberries (2 cups)
- Raspberry jam (1 cup)
- For the Frosting:
- Unsalted butter (1 cup; softened)
- Powdered sugar (4 cups)
- Heavy cream (2 tablespoons)
- Vanilla extract (1 teaspoon)
- For Garnish:
- Fresh raspberries (for decoration)
- Mint leaves (for decoration)
Instructions
Step 1: Prepare the Cake Batter
- Preheat your oven to 350°F (175°C). Grease and flour two 9-inch round cake pans.
- In a large mixing bowl, whisk together the all-purpose flour, baking powder, and salt.
- In another bowl, cream together the softened butter and granulated sugar until light and fluffy, about 3-4 minutes.
- Add the eggs, one at a time, mixing well after each addition. Stir in the milk and vanilla extract.
- Gradually add the dry ingredients to the wet ingredients, mixing until just combined.
Step 2: Bake the Cakes
- Divide the batter evenly between the prepared cake pans.
- Bake in the preheated oven for 25-30 minutes, or until a toothpick inserted into the center comes out clean.
- Once baked, remove the cakes from the oven and let them cool in the pans for 10 minutes. Then, transfer to a wire rack to cool completely.
Step 3: Prepare the Raspberry Filling
- While the cakes are cooling, prepare the filling by combining fresh raspberries and raspberry jam in a bowl. Gently mash the raspberries with a fork to create a chunky filling.
Step 4: Make the Frosting
- In a mixing bowl, beat the softened butter until creamy.
- Gradually add the powdered sugar, mixing on low speed until combined. Add the heavy cream and vanilla extract, then beat on high speed until fluffy and smooth.
Step 5: Assemble the Cake
- Once the cakes are completely cooled, place one layer on a serving plate. Spread the raspberry filling evenly over the top.
- Place the second cake layer on top of the filling.
- Use the frosting to cover the top and sides of the cake, smoothing it out with a spatula.
Step 6: Garnish and Serve
- Decorate the top of the cake with fresh raspberries and mint leaves for a beautiful presentation.
- Slice and serve chilled or at room temperature. Enjoy your delicious creation!