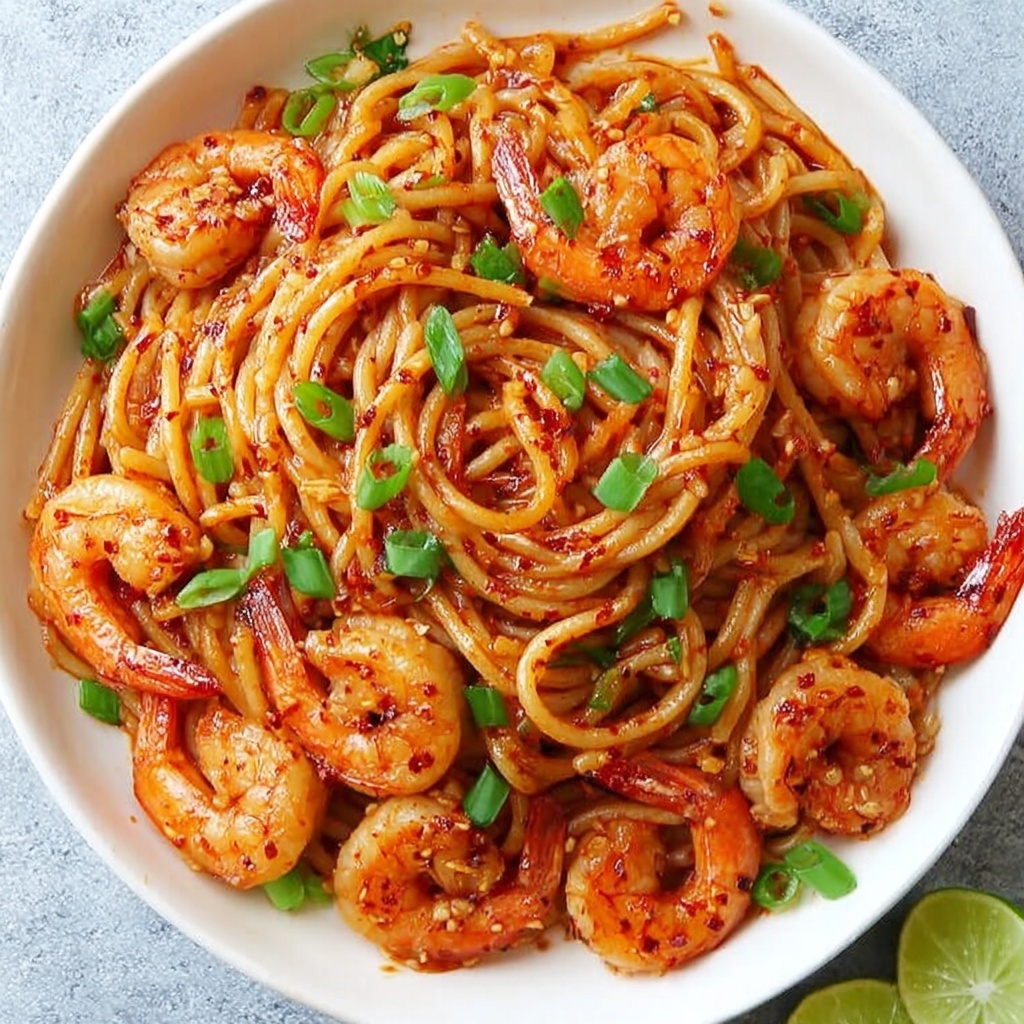
Garlic Chili Shrimp Noodles is a quick and flavorful dish featuring succulent shrimp tossed with noodles in a spicy garlic sauce. This dish is perfect for a weeknight dinner and can be made in under 30 minutes!
Ingredients
- 1 pound large shrimp, peeled and deveined
- 8 ounces noodles (spaghetti, linguine, or rice noodles)
- 3 tablespoons olive oil
- 4 cloves garlic, minced
- 1-2 teaspoons red pepper flakes (adjust to taste)
- 2 tablespoons soy sauce
- 1 tablespoon oyster sauce (optional)
- 1 tablespoon lime juice
- Salt and pepper to taste
- 1/4 cup green onions, chopped (for garnish)
- Fresh cilantro (for garnish, optional)
- Lime wedges (for serving)
Timing
Making the Garlic Chili Shrimp Noodles takes about 10 minutes for preparation and 15 minutes for cooking.
Instructions
Step 1: Cook the Noodles
- Boil Noodles: In a large pot of salted boiling water, cook the noodles according to package instructions until al dente. Drain and set aside.
Step 2: Cook the Shrimp
- Heat Oil: In a large skillet or wok over medium-high heat, add the olive oil.
- Sauté Garlic: Add the minced garlic and red pepper flakes to the skillet. Sauté for about 30 seconds until fragrant, being careful not to burn the garlic.
- Add Shrimp: Add the shrimp to the skillet and season with salt and pepper. Cook for about 2-3 minutes until the shrimp are pink and opaque.
Step 3: Combine Everything
- Add Noodles: Add the cooked noodles to the skillet along with the soy sauce, oyster sauce (if using), and lime juice. Toss everything together to coat the noodles and shrimp evenly in the sauce.
Step 4: Serve
- Plate the Dish: Serve the garlic chili shrimp noodles hot, garnished with chopped green onions and fresh cilantro. Serve with lime wedges on the side.
Nutritional Information
Here’s a quick overview of the nutritional content of the Garlic Chili Shrimp Noodles (per serving, based on 4 servings):
| Nutrient | Amount per Serving |
|---|---|
| Calories | 400 |
| Protein | 25g |
| Fat | 15g |
| Carbohydrates | 45g |
| Fiber | 2g |
| Sugar | 2g |
Tips for Customization
- Add More Vegetables: Include bell peppers, snap peas, or broccoli for added nutrition and color.
- Make it Spicy: Increase the amount of red pepper flakes or add a dash of sriracha for extra heat.
- Use Different Proteins: Substitute shrimp with chicken, tofu, or beef for a different flavor profile.
Conclusion
Garlic Chili Shrimp Noodles are a quick and delicious dish that brings together the bold flavors of garlic and chili with succulent shrimp and noodles. Perfect for busy weeknights, this recipe is sure to become a favorite. Enjoy this delightful recipe!

Garlic Chili Shrimp Noodles Recipe
Ingredients
- • 1 pound large shrimp, peeled and deveined
- • 8 ounces noodles (spaghetti, linguine, or rice noodles)
- • 3 tablespoons olive oil
- • 4 cloves garlic, minced
- • 1-2 teaspoons red pepper flakes (adjust to taste)
- • 2 tablespoons soy sauce
- • 1 tablespoon oyster sauce (optional)
- • 1 tablespoon lime juice
- • Salt and pepper to taste
- • 1/4 cup green onions, chopped (for garnish)
- • Fresh cilantro (for garnish, optional)
- • Lime wedges (for serving)
Instructions
- Boil Noodles: In a large pot of salted boiling water, cook the noodles according to package instructions until al dente. Drain and set aside.
- Heat Oil: In a large skillet or wok over medium-high heat, add the olive oil.
- Sauté Garlic: Add the minced garlic and red pepper flakes to the skillet. Sauté for about 30 seconds until fragrant, being careful not to burn the garlic.
- Add Shrimp: Add the shrimp to the skillet and season with salt and pepper. Cook for about 2-3 minutes until the shrimp are pink and opaque.
- Add Noodles: Add the cooked noodles to the skillet along with the soy sauce, oyster sauce (if using), and lime juice. Toss everything together to coat the noodles and shrimp evenly in the sauce.
- Plate the Dish: Serve the garlic chili shrimp noodles hot, garnished with chopped green onions and fresh cilantro. Serve with lime wedges on the side.
Step 1: Cook the Noodles
Step 2: Cook the Shrimp
Step 3: Combine Everything
Step 4: Serve