Overview
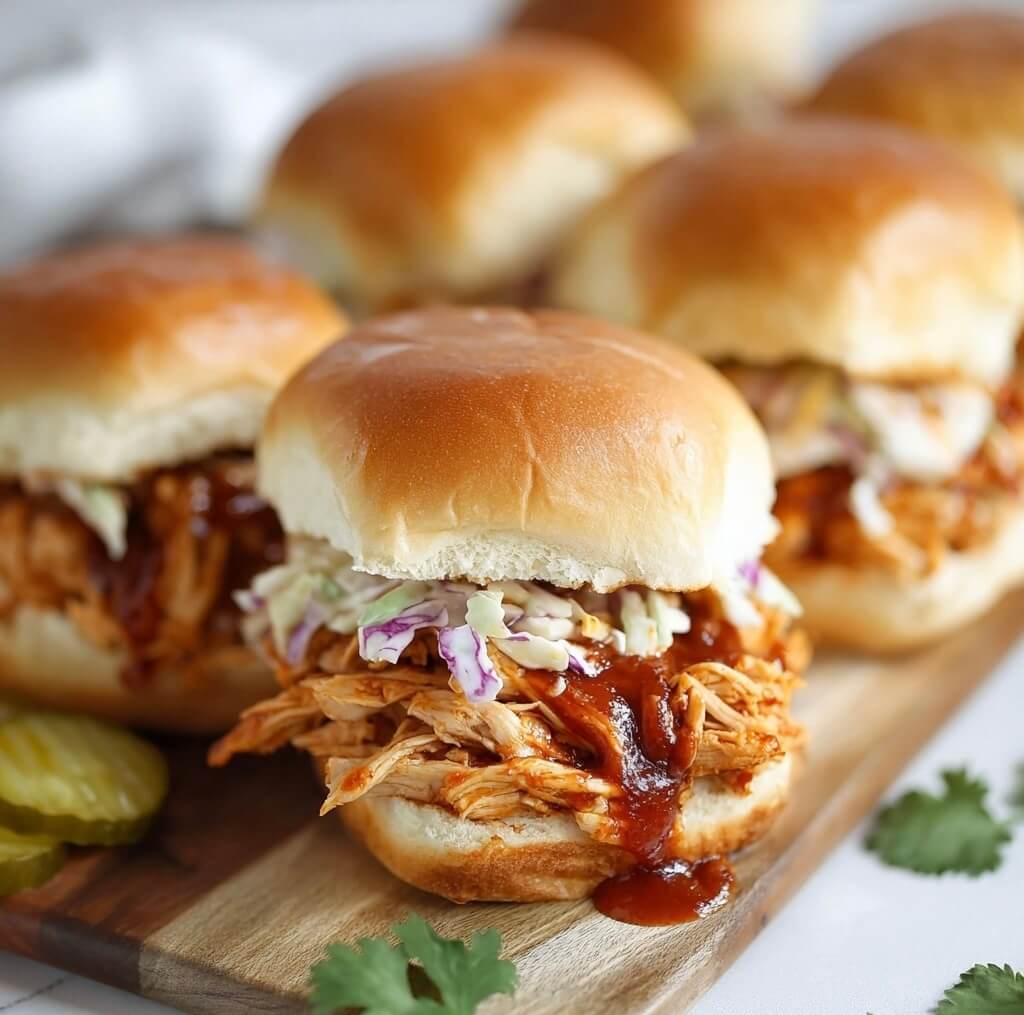
BBQ Chicken Sliders are a delicious and easy-to-make dish featuring tender pulled chicken smothered in barbecue sauce, served on soft slider buns. Perfect for parties, game days, or casual family dinners!
Ingredients
- 2 cups cooked chicken, shredded (rotisserie chicken works well)
- 1 cup barbecue sauce (your favorite brand or homemade)
- 12 slider buns
- 1/2 cup coleslaw (optional, for topping)
- 1/4 cup sliced pickles (optional, for topping)
- 1 tablespoon olive oil (for brushing buns)
- Salt and pepper, to taste
Timing
Making the BBQ Chicken Sliders takes about 10 minutes for preparation and 10-15 minutes for assembly and baking.
Instructions
Step 1: Prepare the Chicken
- Combine Chicken and Sauce: In a medium bowl, mix the shredded chicken with the barbecue sauce until well coated. Season with salt and pepper to taste.
Step 2: Preheat Oven
- Preheat Oven: Preheat your oven to 350°F (175°C).
Step 3: Assemble the Sliders
- Prepare Slider Buns: Slice the slider buns in half horizontally, keeping the tops and bottoms attached.
- Layer Chicken: Place the bottom halves of the buns in a baking dish. Spoon the BBQ chicken mixture evenly over the buns.
- Optional Toppings: If desired, add a layer of coleslaw and sliced pickles on top of the chicken.
- Top with Buns: Place the top halves of the buns over the chicken and toppings.
Step 4: Bake the Sliders
- Brush with Olive Oil: Brush the tops of the slider buns with olive oil to help them brown.
- Cover and Bake: Cover the baking dish with aluminum foil and bake in the preheated oven for 10 minutes. Then, remove the foil and bake for an additional 5 minutes to toast the tops.
Step 5: Serve
- Slice and Serve: Remove from the oven and let cool for a few minutes. Slice the sliders apart and serve warm.
Nutritional Information
Here’s a quick overview of the nutritional content of the BBQ Chicken Sliders (per slider, based on 12 servings):
| Nutrient | Amount per Slider |
|---|---|
| Calories | 180 |
| Protein | 12g |
| Fat | 6g |
| Carbohydrates | 20g |
| Fiber | 1g |
| Sugar | 5g |
Tips for Customization
- Chicken Variations: Use shredded turkey or pork for different flavor profiles.
- BBQ Sauce Options: Experiment with different types of barbecue sauces, such as sweet, smoky, or spicy.
- Add Cheese: Top with cheese slices before baking for cheesy BBQ sliders.
Conclusion
BBQ Chicken Sliders are a crowd-pleasing dish that’s quick and easy to prepare. With tender chicken and flavorful barbecue sauce, these sliders are perfect for any gathering. Enjoy this delightful recipe!

BBQ Chicken Sliders Recipe
Prep Time:
10 minutes
Cook time:
10 minutes
Total Time:
20 minutes
Ingredients
- • 2 cups cooked chicken, shredded (rotisserie chicken works well)
- • 1 cup barbecue sauce (your favorite brand or homemade)
- • 12 slider buns
- • 1/2 cup coleslaw (optional, for topping)
- • 1/4 cup sliced pickles (optional, for topping)
- • 1 tablespoon olive oil (for brushing buns)
- • Salt and pepper, to taste
Instructions
- Combine Chicken and Sauce: In a medium bowl, mix the shredded chicken with the barbecue sauce until well coated. Season with salt and pepper to taste.
- Preheat Oven: Preheat your oven to 350°F (175°C).
- Prepare Slider Buns: Slice the slider buns in half horizontally, keeping the tops and bottoms attached.
- Layer Chicken: Place the bottom halves of the buns in a baking dish. Spoon the BBQ chicken mixture evenly over the buns.
- Optional Toppings: If desired, add a layer of coleslaw and sliced pickles on top of the chicken.
- Top with Buns: Place the top halves of the buns over the chicken and toppings.
- Brush with Olive Oil: Brush the tops of the slider buns with olive oil to help them brown.
- Cover and Bake: Cover the baking dish with aluminum foil and bake in the preheated oven for 10 minutes. Then, remove the foil and bake for an additional 5 minutes to toast the tops.
- Slice and Serve: Remove from the oven and let cool for a few minutes. Slice the sliders apart and serve warm.
Step 1: Prepare the Chicken
Step 2: Preheat Oven
Step 3: Assemble the Sliders
Step 4: Bake the Sliders
Step 5: Serve