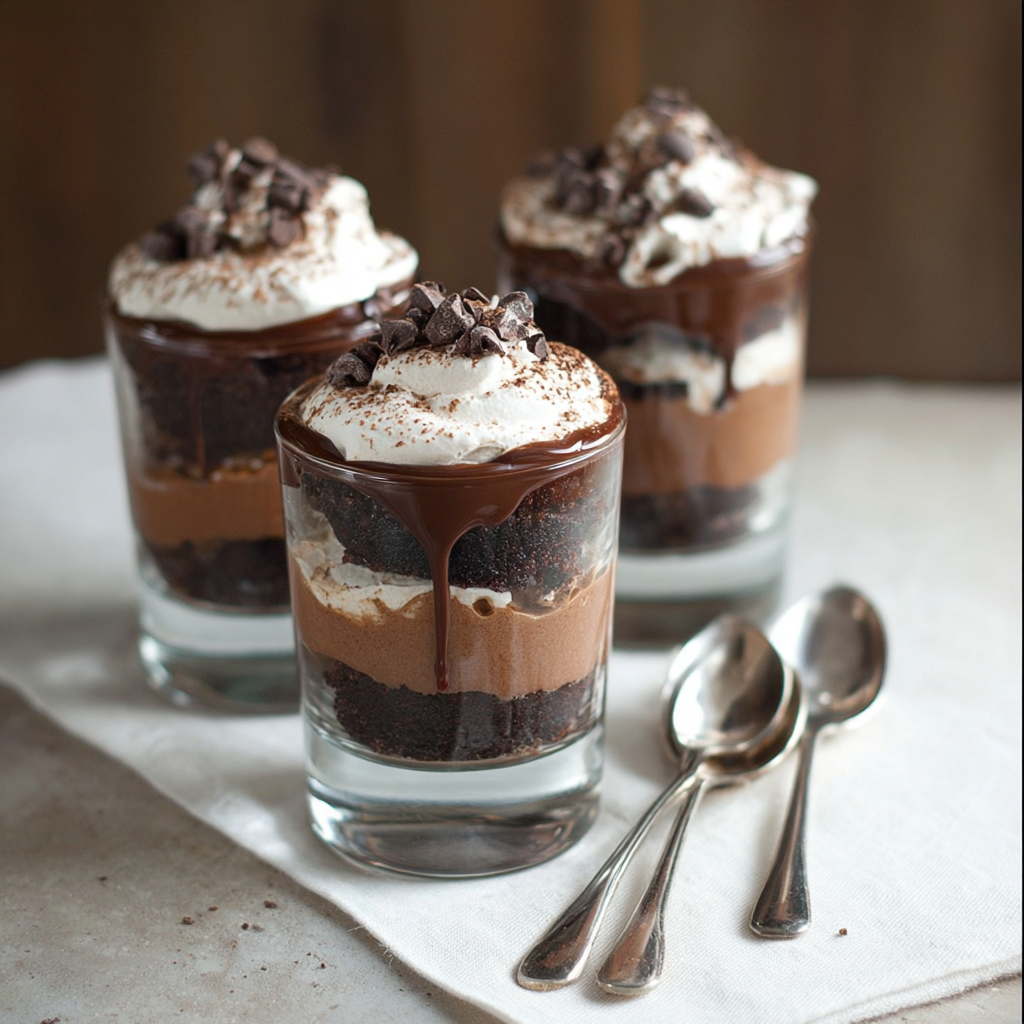
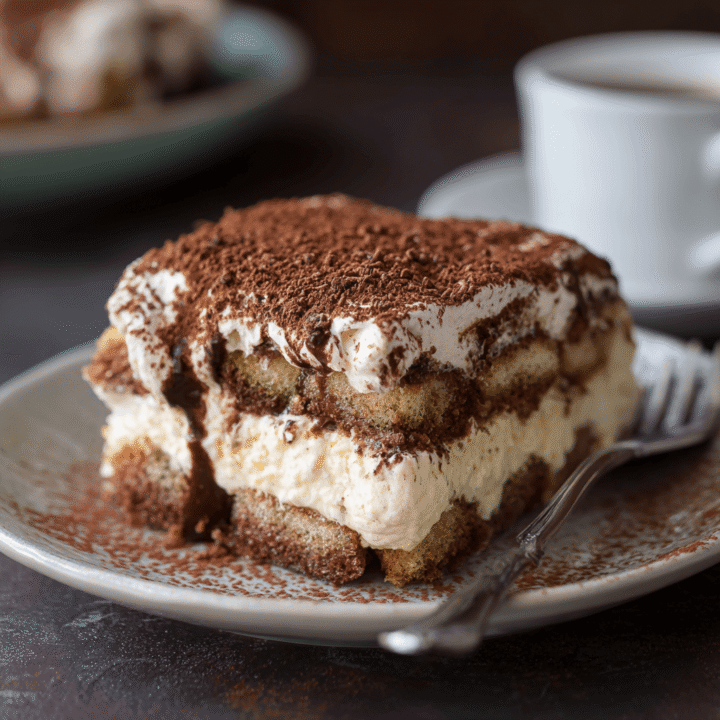
Cocoa Tiramisu is a delightful twist on the classic Italian dessert, combining the rich flavors of hot cocoa with the creamy, coffee-infused layers of traditional tiramisu. This dessert is perfect for chocolate lovers and is sure to impress at any gathering!
Ingredients List
For the Cocoa Mixture:
- 1 cup milk
- 1 cup heavy cream
- 1/3 cup unsweetened cocoa powder
- 1/2 cup granulated sugar
- 1 teaspoon vanilla extract
- 1/4 teaspoon salt
For the Tiramisu Layers:
- 1 cup strong brewed coffee (cooled)
- 1 tablespoon coffee liqueur (optional)
- 1 package (7 ounces) ladyfinger cookies
- 1 cup mascarpone cheese
- 1 cup heavy cream (for whipping)
- 1/2 cup powdered sugar
- 1 teaspoon vanilla extract
- Cocoa powder (for dusting)
Timing
Preparing Hot Cocoa Tiramisu takes about 20 minutes of prep time and at least 4 hours of chilling time (preferably overnight).
Step-by-Step Instructions
Step 1: Prepare the Cocoa Mixture
- Heat Milk and Cream: In a medium saucepan, combine the milk and 1 cup of heavy cream. Heat over medium heat until warm but not boiling.
- Add Cocoa and Sugar: Whisk in the cocoa powder, granulated sugar, vanilla extract, and salt until smooth. Remove from heat and let it cool to room temperature.
Step 2: Prepare the Coffee Mixture
- Combine Coffee: In a shallow dish, mix the brewed coffee with coffee liqueur (if using). Set aside to cool.
Step 3: Make the Mascarpone Filling
- Whip Cream: In a large bowl, whip the remaining 1 cup of heavy cream with powdered sugar and vanilla extract until soft peaks form.
- Combine with Mascarpone: In another bowl, gently fold the mascarpone cheese into the whipped cream until smooth and creamy.
Step 4: Assemble the Tiramisu
- Dip Ladyfingers: Quickly dip each ladyfinger into the coffee mixture, making sure not to soak them too long.
- Layer Ingredients: In a 9×9 inch dish or a similar-sized serving dish, layer half of the dipped ladyfingers at the bottom. Spread half of the mascarpone filling over the ladyfingers, followed by half of the cocoa mixture.
- Repeat Layers: Repeat the process with the remaining ladyfingers, mascarpone filling, and cocoa mixture, finishing with the cocoa mixture on top.
Step 5: Chill and Serve
- Chill: Cover the dish with plastic wrap and refrigerate for at least 4 hours, preferably overnight, to allow the flavors to meld.
- Dust with Cocoa: Before serving, dust the top with cocoa powder for an elegant finish.
- Slice and Enjoy: Cut into squares and serve chilled.

Nutritional Information
Here’s a quick glance at the nutritional profile of Hot Cocoa Tiramisu (per serving, based on 8 servings):
| Nutrient | Amount per Serving |
|---|---|
| Calories | 320 |
| Protein | 4g |
| Fat | 22g |
| Carbohydrates | 30g |
| Sugar | 18g |
Tips for Customization
- Flavor Variations: Add a splash of peppermint extract for a festive twist.
- Nutty Addition: Incorporate chopped nuts like hazelnuts or almonds for added texture.
- Dairy-Free Option: Substitute mascarpone with a dairy-free cream cheese and use almond or coconut milk for the cocoa mixture.
Storing Tips for the Recipe
Store any leftover Hot Cocoa Tiramisu in an airtight container in the refrigerator for up to 3 days. The flavors will continue to develop as it sits.
Conclusion
Hot Cocoa Tiramisu is a luscious and indulgent dessert that combines the best of both worlds—rich hot cocoa and creamy tiramisu. It’s a perfect treat for chocolate lovers and a delightful way to end any meal!
FAQs
Can I make this dessert ahead of time?
Yes, this dessert is great for making ahead of time. It actually tastes better after chilling for a few hours or overnight.
Can I use different types of cookies?
While ladyfingers are traditional, you can use other types of cookies like chocolate wafers or even homemade sponge cake.
Is this dessert suitable for kids?
Yes, this dessert can be made kid-friendly by omitting the coffee liqueur.
Hot Cocoa Tiramisu Recipe
Ingredients
- For the Cocoa Mixture:
- • 1 cup milk
- • 1 cup heavy cream
- • 1/3 cup unsweetened cocoa powder
- • 1/2 cup granulated sugar
- • 1 teaspoon vanilla extract
- • 1/4 teaspoon salt
- For the Tiramisu Layers:
- • 1 cup strong brewed coffee (cooled)
- • 1 tablespoon coffee liqueur (optional)
- • 1 package (7 ounces) ladyfinger cookies
- • 1 cup mascarpone cheese
- • 1 cup heavy cream (for whipping)
- • 1/2 cup powdered sugar
- • 1 teaspoon vanilla extract
- • Cocoa powder (for dusting)
Instructions
Step 1: Prepare the Cocoa Mixture
- In a medium saucepan, combine the milk and 1 cup of heavy cream. Heat over medium heat until warm but not boiling.
- Whisk in the cocoa powder, granulated sugar, vanilla extract, and salt until smooth. Remove from heat and let it cool to room temperature.
Step 2: Prepare the Coffee Mixture
- In a shallow dish, mix the brewed coffee with coffee liqueur (if using). Set aside to cool.
Step 3: Make the Mascarpone Filling
- In a large bowl, whip the remaining 1 cup of heavy cream with powdered sugar and vanilla extract until soft peaks form.
- In another bowl, gently fold the mascarpone cheese into the whipped cream until smooth and creamy.
Step 4: Assemble the Tiramisu
- Quickly dip each ladyfinger into the coffee mixture, making sure not to soak them too long.
- In a 9x9 inch dish or similar-sized serving dish, layer half of the dipped ladyfingers at the bottom. Spread half of the mascarpone filling over the ladyfingers, followed by half of the cocoa mixture.
- Repeat the process with the remaining ladyfingers, mascarpone filling, and cocoa mixture, finishing with the cocoa mixture on top.
Step 5: Chill and Serve
- Cover the dish with plastic wrap and refrigerate for at least 4 hours, preferably overnight, to allow the flavors to meld.
- Before serving, dust the top with cocoa powder for an elegant finish.
- Cut into squares and serve chilled.