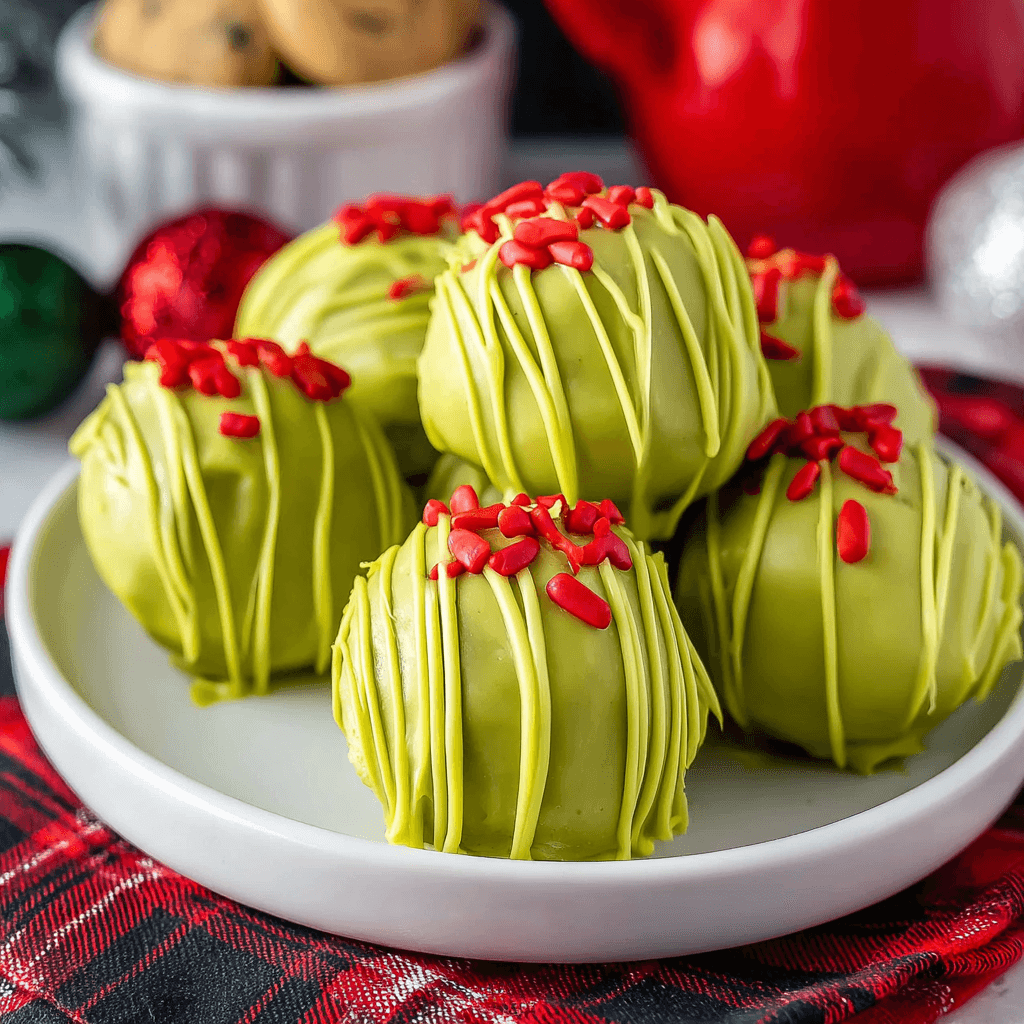
Irresistible No-Bake Grinch Truffles are a fun and festive treat inspired by the beloved Dr. Seuss character, the Grinch. These delicious truffles are easy to make and perfect for holiday gatherings, parties, or as a delightful gift. With a creamy center and a vibrant green coating, they are sure to impress!
Ingredients
For the Truffle Filling:
- 1 cup crushed graham crackers
- 1 cup powdered sugar
- 1/2 cup cream cheese, softened
- 1/4 cup unsweetened cocoa powder
- 1 teaspoon vanilla extract
- 1/4 cup mini chocolate chips (optional)
For the Green Coating:
- 1 1/2 cups white chocolate chips
- 1-2 teaspoons coconut oil (optional, for thinning)
- Green food coloring (gel or liquid)
- Red sprinkles or mini candy canes (for decoration)
Timing
Making Irresistible No-Bake Grinch Truffles takes about 20 minutes for preparation and 30 minutes for chilling.
Instructions
Step 1: Prepare the Truffle Filling
- Mix Ingredients: In a large bowl, combine the crushed graham crackers, powdered sugar, cream cheese, cocoa powder, and vanilla extract. Mix until well combined. If using, fold in the mini chocolate chips.
- Form Balls: Using your hands, roll the mixture into small balls (about 1 inch in diameter) and place them on a baking sheet lined with parchment paper.
Step 2: Chill the Truffles
- Chill: Place the baking sheet in the refrigerator for about 30 minutes, or until the truffles are firm.
Step 3: Prepare the Green Coating
- Melt White Chocolate: In a microwave-safe bowl, melt the white chocolate chips in 30-second intervals, stirring in between until smooth. If desired, add 1-2 teaspoons of coconut oil to thin the chocolate for easier dipping.
- Add Food Coloring: Once melted, add green food coloring to achieve your desired shade of green. Mix well.
Step 4: Coat the Truffles
- Dip Truffles: Remove the chilled truffles from the refrigerator. Using a fork or dipping tool, dip each truffle into the melted green chocolate, allowing any excess to drip off.
- Decorate: Place the coated truffles back on the parchment-lined baking sheet. While the coating is still wet, sprinkle with red sprinkles or mini candy cane pieces for a festive touch.
Step 5: Chill Again
- Set: Place the truffles back in the refrigerator for about 15-20 minutes, or until the chocolate coating is set.
Step 6: Serve
- Enjoy: Once set, serve the Grinch truffles on a festive platter. They can be stored in an airtight container in the refrigerator for up to a week.
Nutritional Information
Here’s a quick overview of the nutritional content of Irresistible No-Bake Grinch Truffles (per truffle, based on 24 servings):
| Nutrient | Amount per Truffle |
|---|---|
| Calories | 100 |
| Protein | 1g |
| Fat | 5g |
| Carbohydrates | 13g |
| Sugar | 7g |
Tips for Customization
- Flavor Variations: Add peppermint extract for a minty flavor or substitute the cocoa powder with crushed nuts or coconut for different taste profiles.
- Dairy-Free Option: Use dairy-free cream cheese and chocolate to make these truffles suitable for a dairy-free diet.
- Decorative Options: Use different colored sprinkles or edible glitter for a unique touch.
Conclusion
Irresistible No-Bake Grinch Truffles are a delightful and easy treat that brings holiday cheer to any gathering. With their creamy filling and festive coating, they’re sure to be a hit with both kids and adults!
FAQs
Can I make these truffles ahead of time?
Yes! These truffles can be made a few days in advance and stored in the refrigerator until you’re ready to serve.
What can I use instead of graham crackers?
You can substitute crushed cookies, like Oreos or digestive biscuits, for a different flavor.

Irresistible No-Bake Grinch Truffles Recipe
Ingredients
- For the Truffle Filling:
- • 1 cup crushed graham crackers
- • 1 cup powdered sugar
- • 1/2 cup cream cheese, softened
- • 1/4 cup unsweetened cocoa powder
- • 1 teaspoon vanilla extract
- • 1/4 cup mini chocolate chips (optional)
- For the Green Coating:
- • 1 1/2 cups white chocolate chips
- • 1-2 teaspoons coconut oil (optional, for thinning)
- • Green food coloring (gel or liquid)
- • Red sprinkles or mini candy canes (for decoration)
Instructions
Step 1: Prepare the Truffle Filling
- Mix Ingredients: In a large bowl, combine the crushed graham crackers, powdered sugar, cream cheese, cocoa powder, and vanilla extract. Mix until well combined. If using, fold in the mini chocolate chips.
- Form Balls: Using your hands, roll the mixture into small balls (about 1 inch in diameter) and place them on a baking sheet lined with parchment paper.
Step 2: Chill the Truffles
- Chill: Place the baking sheet in the refrigerator for about 30 minutes, or until the truffles are firm.
Step 3: Prepare the Green Coating
- Melt White Chocolate: In a microwave-safe bowl, melt the white chocolate chips in 30-second intervals, stirring in between until smooth. If desired, add 1-2 teaspoons of coconut oil to thin the chocolate for easier dipping.
- Add Food Coloring: Once melted, add green food coloring to achieve your desired shade of green. Mix well.
Step 4: Coat the Truffles
- Dip Truffles: Remove the chilled truffles from the refrigerator. Using a fork or dipping tool, dip each truffle into the melted green chocolate, allowing any excess to drip off.
- Decorate: Place the coated truffles back on the parchment-lined baking sheet. While the coating is still wet, sprinkle with red sprinkles or mini candy cane pieces for a festive touch.
Step 5: Chill Again
- Set: Place the truffles back in the refrigerator for about 15-20 minutes, or until the chocolate coating is set.
Step 6: Serve
- Enjoy: Once set, serve the Grinch truffles on a festive platter. They can be stored in an airtight container in the refrigerator for up to a week.