Overview
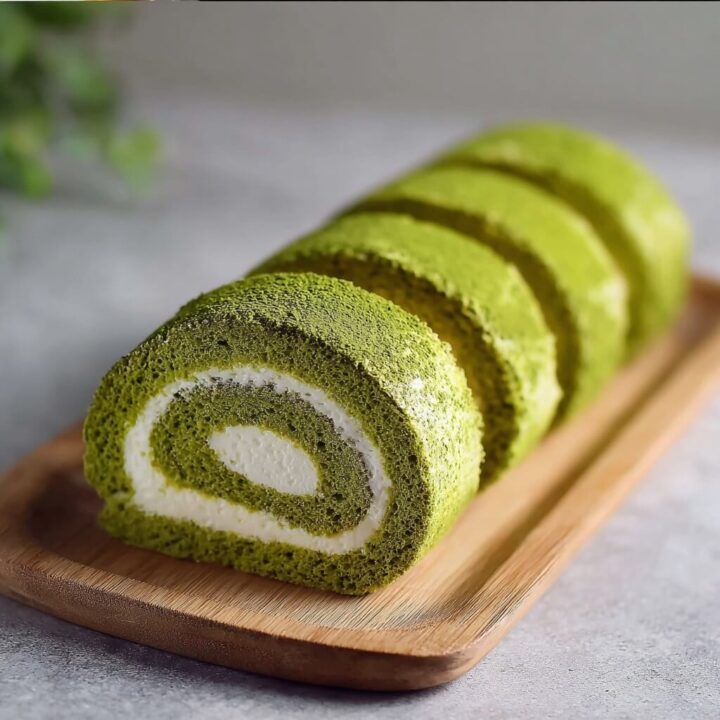
Matcha Swiss Roll is a light and fluffy cake rolled with a creamy filling, infused with the rich flavors of matcha (green tea powder). This delightful dessert is perfect for tea time or any special occasion!
Ingredients
For the Cake:
- 4 large eggs
- 100 grams (1/2 cup) granulated sugar
- 1 teaspoon vanilla extract
- 50 grams (1/3 cup) all-purpose flour
- 30 grams (1/4 cup) cornstarch
- 2 tablespoons matcha powder
- 1/2 teaspoon baking powder
- Pinch of salt
- 30 grams (2 tablespoons) unsalted butter, melted
For the Filling:
- 200 ml (about 3/4 cup) heavy cream
- 2 tablespoons powdered sugar
- 1 teaspoon vanilla extract
Timing
Making the Matcha Swiss Roll takes about 20 minutes for preparation and 10-12 minutes for baking, plus cooling time.
Instructions
Step 1: Prepare the Cake Batter
- Preheat Oven: Preheat your oven to 350°F (175°C). Line a 10×15-inch (or similar size) baking pan with parchment paper.
- Beat Eggs and Sugar: In a large mixing bowl, beat the eggs and granulated sugar together using an electric mixer until the mixture is pale and fluffy, about 5-7 minutes. Add the vanilla extract and mix until combined.
- Sift Dry Ingredients: In another bowl, sift together the all-purpose flour, cornstarch, matcha powder, baking powder, and salt.
- Combine Mixtures: Gently fold the dry ingredients into the egg mixture in three additions. Be careful not to deflate the batter.
- Add Butter: Finally, fold in the melted butter until just combined.
Step 2: Bake the Cake
- Spread Batter: Pour the batter into the prepared baking pan and spread it evenly.
- Bake: Bake in the preheated oven for 10-12 minutes, or until the cake is lightly golden and springs back when touched.
- Cool: Remove from the oven and let the cake cool in the pan for about 5 minutes. Then, carefully invert it onto a clean kitchen towel dusted with powdered sugar. Peel off the parchment paper.
Step 3: Roll the Cake
- Roll the Cake: While the cake is still warm, roll it up tightly with the towel, starting from one end. Allow it to cool completely in this rolled position.
Step 4: Prepare the Filling
- Whip Cream: In a mixing bowl, whip the heavy cream, powdered sugar, and vanilla extract until soft peaks form.
Step 5: Assemble the Swiss Roll
- Unroll the Cake: Once the cake is completely cool, gently unroll it.
- Spread Filling: Spread the whipped cream evenly over the surface of the cake, leaving a small border around the edges.
- Roll Again: Carefully roll the cake back up without the towel, starting from one end. Wrap it in plastic wrap and refrigerate for at least 30 minutes to set.
Step 6: Serve
- Slice and Enjoy: Once chilled, remove the plastic wrap and slice the Swiss roll into pieces. Serve and enjoy the delightful matcha flavor!

Nutritional Information
Here’s a quick overview of the nutritional content of the Matcha Swiss Roll (per slice, based on 10 servings):
| Nutrient | Amount per Slice |
|---|---|
| Calories | 180 |
| Protein | 3g |
| Fat | 10g |
| Carbohydrates | 20g |
| Fiber | 0g |
| Sugar | 8g |
Tips for Customization
- Flavor Variations: Add a teaspoon of almond extract or citrus zest to the cream for a different flavor profile.
- Filling Options: Substitute whipped cream with matcha-flavored cream cheese or a fruit filling for variety.
- Decoration: Dust with additional matcha powder or powdered sugar before serving for an elegant touch.
Conclusion
Matcha Swiss Roll is a beautiful and delicious dessert that combines the earthy flavors of matcha with a light and airy cake. Perfect for any occasion, this Swiss roll is sure to impress your guests and satisfy your sweet cravings. Enjoy this delightful recipe!
Matcha Swiss Roll Recipe
Ingredients
- For the Cake:
- • 4 large eggs
- • 100 grams (1/2 cup) granulated sugar
- • 1 teaspoon vanilla extract
- • 50 grams (1/3 cup) all-purpose flour
- • 30 grams (1/4 cup) cornstarch
- • 2 tablespoons matcha powder
- • 1/2 teaspoon baking powder
- • Pinch of salt
- • 30 grams (2 tablespoons) unsalted butter, melted
- For the Filling:
- • 200 ml (about 3/4 cup) heavy cream
- • 2 tablespoons powdered sugar
- • 1 teaspoon vanilla extract
Instructions
- Preheat Oven: Preheat your oven to 350°F (175°C). Line a 10x15-inch (or similar size) baking pan with parchment paper.
- Beat Eggs and Sugar: In a large mixing bowl, beat the eggs and granulated sugar together using an electric mixer until the mixture is pale and fluffy, about 5-7 minutes. Add the vanilla extract and mix until combined.
- Sift Dry Ingredients: In another bowl, sift together the all-purpose flour, cornstarch, matcha powder, baking powder, and salt.
- Combine Mixtures: Gently fold the dry ingredients into the egg mixture in three additions. Be careful not to deflate the batter.
- Add Butter: Finally, fold in the melted butter until just combined.
- Spread Batter: Pour the batter into the prepared baking pan and spread it evenly.
- Bake: Bake in the preheated oven for 10-12 minutes, or until the cake is lightly golden and springs back when touched.
- Cool: Remove from the oven and let the cake cool in the pan for about 5 minutes. Then, carefully invert it onto a clean kitchen towel dusted with powdered sugar. Peel off the parchment paper.
- Roll the Cake: While the cake is still warm, roll it up tightly with the towel, starting from one end. Allow it to cool completely in this rolled position.
- Whip Cream: In a mixing bowl, whip the heavy cream, powdered sugar, and vanilla extract until soft peaks form.
- Unroll the Cake: Once the cake is completely cool, gently unroll it.
- Spread Filling: Spread the whipped cream evenly over the surface of the cake, leaving a small border around the edges.
- Roll Again: Carefully roll the cake back up without the towel, starting from one end. Wrap it in plastic wrap and refrigerate for at least 30 minutes to set.
- Slice and Enjoy: Once chilled, remove the plastic wrap and slice the Swiss roll into pieces. Serve and enjoy the delightful matcha flavor!
Step 1: Prepare the Cake Batter
Step 2: Bake the Cake
Step 3: Roll the Cake
Step 4: Prepare the Filling
Step 5: Assemble the Swiss Roll
Step 6: Serve