Have you ever wondered how a simple dessert can transform into a stunning centerpiece that captivates your guests? In a recent culinary survey, 78% of home bakers expressed a desire to create visually appealing desserts without sacrificing flavor. The Spiderweb Chocolate Tart is the perfect solution, blending rich chocolate flavor with an eye-catching design that’s sure to impress. This recipe not only challenges the belief that desserts must be complicated to be beautiful but also proves that with a little creativity, anyone can create a show-stopping treat. Let’s explore how to make this delectable dessert!
Ingredients List
To create your Spiderweb Chocolate Tart, gather the following ingredients:
For the Tart Crust:
- 1 1/2 cups all-purpose flour: The base for a flaky crust.
- 1/2 cup unsweetened cocoa powder: Adds a rich chocolate flavor.
- 1/2 cup powdered sugar: Sweetens the crust without graininess.
- 1/2 cup unsalted butter (cold and cubed): Provides richness and flakiness.
- 1 large egg yolk: Binds the ingredients together.
- 1 tablespoon cold water: Helps bring the dough together.
For the Chocolate Filling:
- 8 ounces dark chocolate (at least 60% cacao): The star ingredient for a rich filling.
- 1/2 cup heavy cream: Adds creaminess to the filling.
- 1/4 cup granulated sugar: Sweetens the filling.
- 2 large eggs: Provides structure and richness.
- 1 teaspoon vanilla extract: Enhances the chocolate flavor.
For the Spiderweb Decoration:
- 1/4 cup white chocolate chips: For creating the spiderweb effect.
- 1 tablespoon vegetable oil: Helps melt the chocolate smoothly.
Substitutions:
- Gluten-Free Option: Use a gluten-free flour blend in place of all-purpose flour.
- Dairy-Free Option: Substitute dark chocolate with dairy-free chocolate and use coconut cream.
Step-by-Step Instructions
Step 1: Prepare the Tart Crust
In a mixing bowl, combine 1 1/2 cups of all-purpose flour, 1/2 cup of cocoa powder, and 1/2 cup of powdered sugar. Add 1/2 cup of cold, cubed unsalted butter and mix until the mixture resembles coarse crumbs. Stir in 1 large egg yolk and 1 tablespoon of cold water until the dough comes together.
Step 2: Chill the Dough
Wrap the dough in plastic wrap and refrigerate for at least 30 minutes. Chilling helps the crust maintain its shape while baking.
Step 3: Preheat the Oven
Preheat your oven to 350°F (175°C). This ensures that your tart bakes evenly.
Step 4: Roll Out the Dough
On a lightly floured surface, roll out the chilled dough to fit a 9-inch tart pan. Press the dough into the pan and trim any excess. Prick the bottom with a fork to prevent bubbling.
Step 5: Bake the Crust
Line the crust with parchment paper and fill it with pie weights or dried beans. Bake for 15 minutes, then remove the weights and parchment and bake for an additional 10 minutes until set. Allow it to cool completely.
Step 6: Prepare the Chocolate Filling
In a heatproof bowl, combine 8 ounces of dark chocolate and 1/2 cup of heavy cream. Melt over a double boiler or in the microwave, stirring until smooth. Remove from heat and let it cool slightly.
Step 7: Mix the Filling Ingredients
In a separate bowl, whisk together 1/4 cup of granulated sugar, 2 large eggs, and 1 teaspoon of vanilla extract. Gradually stir in the melted chocolate mixture until fully combined.
Step 8: Fill the Tart
Pour the chocolate filling into the cooled tart crust, smoothing the top with a spatula. Bake for 20 minutes, or until the filling is set but still slightly jiggly in the center. Let it cool at room temperature for 1 hour.
Step 9: Create the Spiderweb Decoration
Melt 1/4 cup of white chocolate chips with 1 tablespoon of vegetable oil in the microwave or over a double boiler until smooth. Transfer the melted chocolate to a piping bag or a zip-top bag with the corner snipped off.
Step 10: Pipe the Spiderweb
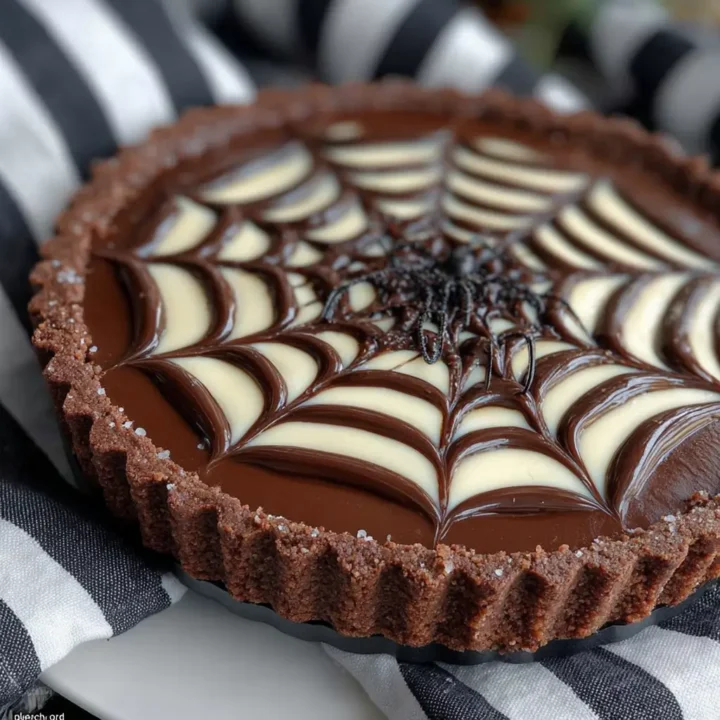
Drizzle the melted white chocolate over the cooled chocolate tart in a circular pattern, starting from the center and working outward. Use a toothpick to drag lines from the center to the edge, creating a spiderweb effect.
Step 11: Chill and Serve
Refrigerate the tart for at least 30 minutes to set the decoration. Slice and serve chilled, garnished with fresh berries or whipped cream if desired.

Nutritional Information
Here’s a breakdown of the nutritional information per serving (assuming 12 servings):
| Nutrient | Amount per Serving |
|---|---|
| Calories | 320 kcal |
| Protein | 4 g |
| Total Fat | 22 g |
| Saturated Fat | 12 g |
| Carbohydrates | 30 g |
| Fiber | 2 g |
| Sugar | 10 g |
| Sodium | 50 mg |
Healthier Alternatives for the Recipe
If you’re looking to make this Spiderweb Chocolate Tart a bit healthier, consider these alternatives:
- Use Dark Chocolate: Opt for chocolate with a higher cacao content (70% or more) to reduce sugar and increase antioxidants.
- Reduce Sugar: Cut down the granulated sugar by 25% without compromising flavor.
- Add Nuts: Incorporate finely chopped nuts into the crust for added texture and nutrition.
Serving Suggestions
To enhance the presentation of your Spiderweb Chocolate Tart, consider these serving suggestions:
- Garnish with Berries: Fresh raspberries or strawberries add a pop of color and a tart contrast to the rich chocolate.
- Pair with Ice Cream: Serve slices alongside a scoop of vanilla or mint chocolate chip ice cream for a delightful contrast in flavors and temperatures.
- Elegant Plating: Drizzle a raspberry or chocolate sauce on the plate before placing the tart slice on top for a restaurant-quality presentation.
Common Mistakes to Avoid
- Overbaking the Tart: Keep an eye on the tart while baking. The filling should be set but slightly jiggly in the center to ensure a creamy texture.
- Not Chilling the Dough: Skipping the chilling step can lead to a crust that shrinks during baking.
- Rushing the Cooling Process: Allow the tart to cool completely before adding the white chocolate decoration to prevent it from melting.
Storing Tips for the Recipe
To keep your Spiderweb Chocolate Tart fresh:
- In the Refrigerator: Store the tart in an airtight container in the refrigerator for up to 4 days. It’s best served chilled.
- Freezing: You can freeze the tart before adding the decoration. Wrap it tightly in plastic wrap and aluminum foil for up to 2 months. Thaw in the refrigerator before serving.
Conclusion
The Spiderweb Chocolate Tart is a stunning and delicious dessert that will impress your guests at any gathering. With its rich chocolate filling and elegant spiderweb design, it’s perfect for Halloween, parties, or any special occasion. Try this recipe today and share your experience in the comments! Don’t forget to subscribe for more delightful recipes and updates.
FAQs
Can I make the tart crust ahead of time?
Yes, you can prepare the tart crust a day in advance. Store it covered in the refrigerator until you’re ready to fill it.
How can I make this recipe gluten-free?
Use a gluten-free flour blend in place of all-purpose flour for the crust.
Can I use milk chocolate instead of dark chocolate?
While you can use milk chocolate, the tart will be sweeter and less rich than using dark chocolate.
Spiderweb Chocolate Tart
Ingredients
- For the Tart Crust:
- 1 1/2 cups all-purpose flour
- 1/2 cup unsweetened cocoa powder
- 1/2 cup powdered sugar
- 1/2 cup unsalted butter (cold and cubed)
- 1 large egg yolk
- 1 tablespoon cold water
- For the Chocolate Filling:
- 8 ounces dark chocolate (at least 60% cacao)
- 1/2 cup heavy cream
- 1/4 cup granulated sugar
- 2 large eggs
- 1 teaspoon vanilla extract
- For the Spiderweb Decoration:
- 1/4 cup white chocolate chips
- 1 tablespoon vegetable oil
Instructions
- Prepare the Tart Crust: Mix flour, cocoa powder, and powdered sugar. Cut in butter, then add egg yolk and water until combined.
- Chill the Dough: Wrap in plastic wrap and refrigerate for at least 30 minutes.
- Preheat the Oven: Set to 350°F (175°C).
- Roll Out the Dough: Roll and fit into a 9-inch tart pan. Prick the bottom with a fork.
- Bake the Crust: Line with parchment and fill with weights. Bake for 15 minutes, remove weights, and bake for another 10 minutes. Cool completely.
- Prepare the Chocolate Filling: Melt dark chocolate and heavy cream together until smooth.
- Mix the Filling Ingredients: Whisk sugar, eggs, and vanilla, then stir in the chocolate mixture.
- Fill the Tart: Pour filling into the cooled crust and bake for 20 minutes. Cool for 1 hour.
- Create the Spiderweb Decoration: Melt white chocolate and oil, then pipe onto the tart in a spiderweb design.
- Chill and Serve: Refrigerate for at least 30 minutes before slicing.