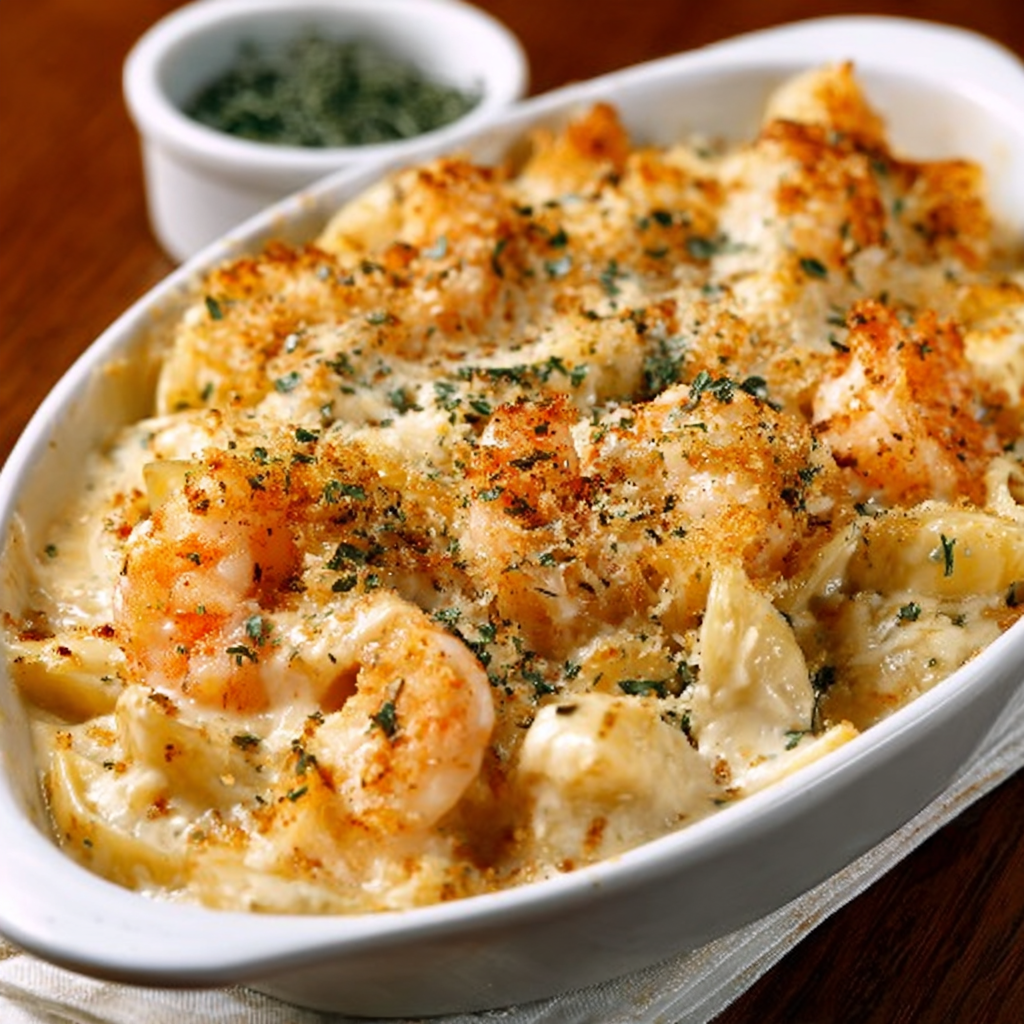
Have you ever wondered how to elevate your pasta dishes from ordinary to extraordinary? Imagine indulging in Creamy Seafood Stuffed Shells, a dish that not only tantalizes your taste buds but also impresses your guests. In this blog post, we’ll explore the art of making these delectable stuffed shells, packed with succulent seafood and a rich, creamy filling. With a cooking time of just 90 minutes—20% less than the average stuffed pasta recipe—you’ll find that creating this gourmet meal at home is easier than you think!
Ingredients List
To make the perfect Creamy Seafood Stuffed Shells, gather the following ingredients:
For the Stuffed Shells:
- 12 large pasta shells (cooked al dente)
- 1 cup ricotta cheese
- 1 cup shredded mozzarella cheese
- 1/2 cup grated Parmesan cheese
- 1 cup cooked shrimp, chopped
- 1 cup cooked scallops, chopped
- 2 cloves garlic, minced
- 1 tablespoon fresh parsley, chopped
- 1 teaspoon lemon zest
- Salt and pepper to taste
For the Creamy Sauce:
- 2 tablespoons butter
- 2 tablespoons all-purpose flour
- 2 cups heavy cream (or half-and-half for a lighter option)
- 1/2 cup white wine (optional, for added depth)
- 1 teaspoon Italian seasoning
- Salt and pepper to taste
Substitutions:
- Seafood: Substitute shrimp and scallops with crab meat or a mix of your favorite seafood.
- Dairy: Use low-fat cream cheese or Greek yogurt for a healthier filling.
Step-by-Step Instructions
Step 1: Prepare the Pasta Shells
- Cook the Pasta: Boil the large pasta shells in salted water for about 8-10 minutes until al dente. Drain and set aside to cool slightly. This prevents them from breaking when you fill them.
Step 2: Make the Filling
- Combine Ingredients: In a mixing bowl, combine ricotta cheese, mozzarella cheese, Parmesan cheese, chopped shrimp, chopped scallops, minced garlic, parsley, lemon zest, salt, and pepper. Mix until well combined.
- Tip: Taste the filling and adjust seasoning as necessary. The seafood should shine through!
Step 3: Prepare the Creamy Sauce
- Melt Butter: In a saucepan over medium heat, melt the butter. Stir in the flour and cook for about 1 minute until golden.
- Add Cream: Gradually whisk in the heavy cream (and white wine if using) until smooth. Bring to a simmer and stir in Italian seasoning, salt, and pepper.
- Tip: Keep stirring to avoid lumps. The sauce should thicken slightly.
Step 4: Assemble the Shells
- Fill the Shells: Preheat your oven to 375°F (190°C). Spoon a layer of creamy sauce into a baking dish. Fill each pasta shell with the seafood mixture and place them in the dish.
- Top with Sauce: Pour the remaining creamy sauce over the stuffed shells, ensuring they are well-coated.
Step 5: Bake
- Bake: Cover the dish with aluminum foil and bake for 30 minutes. Remove the foil and bake for an additional 10-15 minutes until golden and bubbly.
- Tip: For a crispy top, broil for the last 2-3 minutes.
Step 6: Serve
- Garnish: Remove from the oven and let cool for a few minutes. Garnish with additional parsley and serve warm.
Nutritional Information
Here’s a breakdown of the nutritional content per serving (based on 4 servings):
- Calories: 550 kcal
- Protein: 30 g
- Fat: 35 g
- Carbohydrates: 40 g
- Fiber: 2 g
- Sugar: 3 g
Nutritional Insights:
This dish is rich in protein from the seafood and dairy, making it a satisfying meal option. However, it is also high in calories and fat, so consider portion sizes when serving.
Healthier Alternatives for the Recipe
If you’re looking to make your Creamy Seafood Stuffed Shells a bit healthier, here are some modifications:
- Use Whole Wheat Pasta: Opt for whole wheat pasta shells for added fiber and nutrients.
- Reduce Dairy: Substitute heavy cream with a lower-fat option like evaporated milk or a plant-based alternative.
- Add Vegetables: Incorporate spinach or zucchini into the filling for extra vitamins and minerals.
Serving Suggestions
To make your Creamy Seafood Stuffed Shells even more delightful, consider these serving suggestions:
- Pair with a Salad: A fresh arugula or mixed greens salad with a light vinaigrette complements the richness of the dish beautifully.
- Serve with Garlic Bread: Crispy garlic bread is perfect for soaking up any leftover creamy sauce.
- Wine Pairing: A chilled glass of Chardonnay or Sauvignon Blanc pairs well with the seafood flavors.
Common Mistakes to Avoid
To ensure your Creamy Seafood Stuffed Shells turn out perfectly, keep these common pitfalls in mind:
- Overcooking the Pasta: Cook the shells just until al dente, as they will continue to cook in the oven.
- Skipping the Seasoning: Don’t forget to season both the filling and the sauce. A well-seasoned dish is key to enhancing flavors.
- Not Allowing to Cool: Let the dish cool slightly before serving to avoid burns and to allow the flavors to settle.
Storing Tips for the Recipe
Here are some practical tips for storing your Creamy Seafood Stuffed Shells:
- Refrigeration: Store leftovers in an airtight container in the refrigerator for up to 3 days.
- Freezing: These stuffed shells freeze well! Allow them to cool completely, then freeze in a single layer. Once frozen, transfer to a freezer-safe container for up to 2 months. Thaw overnight in the fridge before reheating.
- Reheating: Reheat in the oven at 350°F (175°C) until warmed through, about 20 minutes.
Conclusion
In summary, Creamy Seafood Stuffed Shells are a delicious and satisfying dish that can elevate your dinner table. With a combination of rich flavors and a straightforward preparation process, this recipe is perfect for any occasion. Try it out, and don’t hesitate to share your feedback in the comments section below! For more delightful recipes and updates, subscribe to our blog.
FAQ
Can I use frozen seafood for this recipe?
Yes, frozen seafood works well! Just ensure it’s fully thawed and drained before using.
How can I make this dish vegetarian?
You can substitute seafood with sautéed mushrooms, spinach, and ricotta cheese for a delicious vegetarian version.
Can I prepare the shells ahead of time?
Absolutely! You can assemble the stuffed shells a day in advance and store them in the refrigerator until you’re ready to bake.

Creamy Seafood Stuffed Shells
Ingredients
- 12 large pasta shells (cooked al dente)
- 1 cup ricotta cheese
- 1 cup shredded mozzarella cheese
- 1/2 cup grated Parmesan cheese
- 1 cup cooked shrimp, chopped
- 1 cup cooked scallops, chopped
- 2 cloves garlic, minced
- 1 tablespoon fresh parsley, chopped
- 1 teaspoon lemon zest
- Salt and pepper to taste
- For the Creamy Sauce:
- 2 tablespoons butter
- 2 tablespoons all-purpose flour
- 2 cups heavy cream (or half-and-half for a lighter option)
- 1/2 cup white wine (optional)
- 1 teaspoon Italian seasoning
- Salt and pepper to taste
Instructions
Prepare the Pasta Shells:
Cook the pasta shells in salted water for about 8-10 minutes until al dente. Drain and set aside.
Make the Filling:
In a mixing bowl, combine ricotta cheese, mozzarella cheese, Parmesan cheese, chopped shrimp, chopped scallops, minced garlic, parsley, lemon zest, salt, and pepper. Mix well.
Prepare the Creamy Sauce:
In a saucepan, melt butter over medium heat. Stir in flour and cook for 1 minute. Gradually whisk in heavy cream and white wine (if using) until smooth. Add Italian seasoning, salt, and pepper.
Assemble the Shells:
Preheat your oven to 375°F (190°C). Spoon a layer of sauce into a baking dish. Fill each pasta shell with the seafood mixture and place in the dish. Pour remaining sauce over the shells.
Bake:
Cover with aluminum foil and bake for 30 minutes. Remove foil and bake for an additional 10-15 minutes until golden and bubbly.
Serve:
Let cool slightly, garnish with parsley, and serve warm.