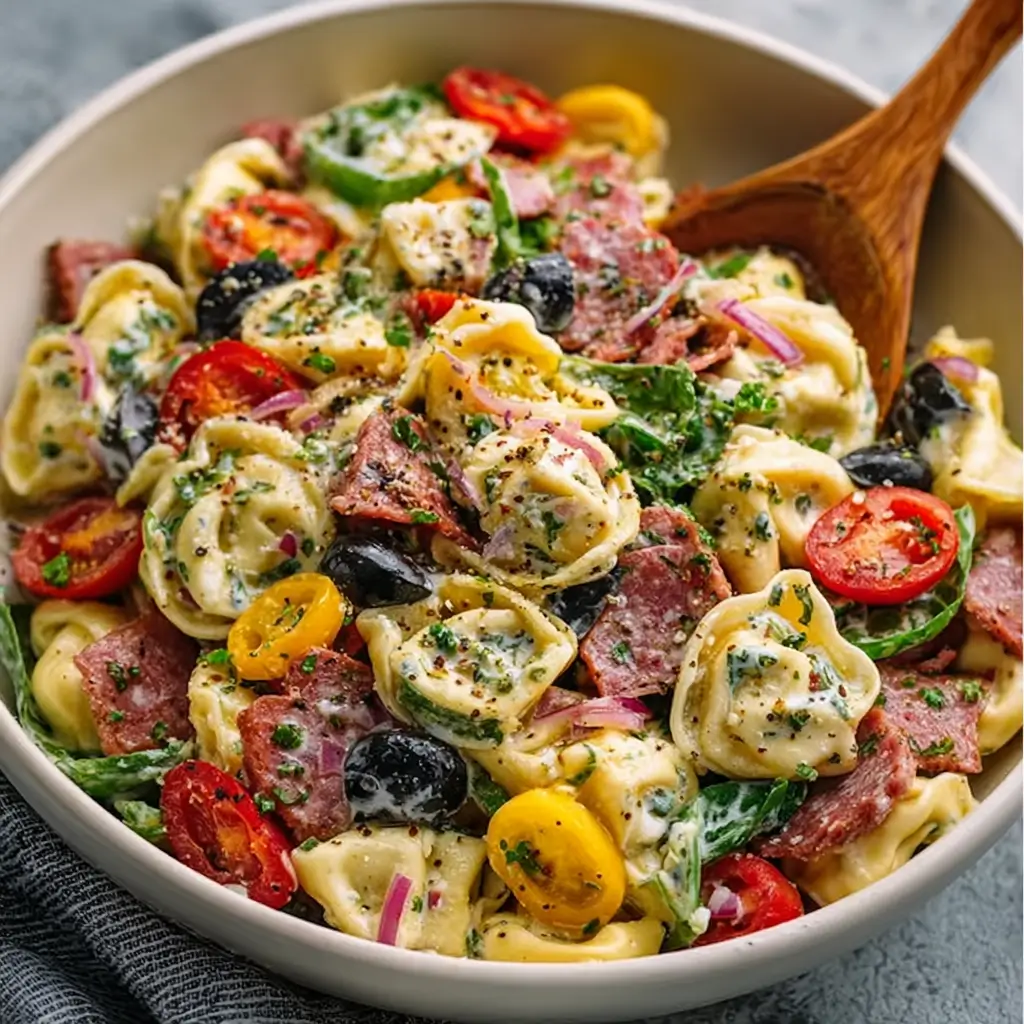
Are you looking for a quick, delicious, and nutritious meal that can be served at any occasion? Tortellini Pasta Salad might just be the answer! Did you know that pasta salads are among the top choices for summer gatherings, with a 30% increase in recipe searches during warmer months? This dish not only satisfies your taste buds but also provides a colorful array of vegetables, making it a perfect addition to your meal rotation. Let’s dive into this delightful recipe that’s as easy to make as it is to enjoy!
Ingredients List
To create a vibrant Tortellini Pasta Salad, you’ll need the following ingredients:
- 12 oz Cheese Tortellini (fresh or frozen)
- 1 cup Cherry Tomatoes, halved
- 1 cup Cucumber, diced
- 1/2 cup Red Onion, finely chopped
- 1/2 cup Bell Pepper, diced (any color)
- 1/4 cup Black Olives, sliced
- 1/2 cup Feta Cheese, crumbled
- 1/4 cup Fresh Basil, chopped
- 1/4 cup Olive Oil
- 2 tbsp Red Wine Vinegar
- 1 tsp Italian Seasoning
- Salt and Pepper to taste
Substitution Suggestions:
- Tortellini: Use whole wheat or gluten-free tortellini for a healthier alternative.
- Vegetables: Feel free to swap in seasonal vegetables like zucchini or spinach.
- Feta Cheese: Goat cheese or mozzarella can be used for a different flavor profile.
Step-by-Step Instructions
Step 1: Cook the Tortellini
- Bring a large pot of salted water to a boil. Add the tortellini and cook according to package instructions (usually about 3-5 minutes for fresh tortellini).
- Tip: Stir gently to prevent sticking.
Step 2: Prepare the Vegetables
- While the tortellini cooks, chop the tomatoes, cucumber, red onion, and bell pepper.
- Tip: Use a sharp knife for clean cuts and uniform sizes.
Step 3: Drain and Cool
- Once the tortellini is cooked, drain and rinse under cold water to stop the cooking process and cool it down.
- Tip: This also helps prevent the pasta from becoming mushy.
Step 4: Mix the Salad
- In a large bowl, combine the cooled tortellini, chopped vegetables, olives, and feta cheese.
- Tip: Gently toss to avoid breaking the tortellini.
Step 5: Dress the Salad
- In a small bowl, whisk together the olive oil, red wine vinegar, Italian seasoning, salt, and pepper.
- Tip: Adjust the seasoning to taste before adding to the salad.
Step 6: Combine and Serve
- Pour the dressing over the salad and toss gently until everything is well coated.
- Tip: Let it sit for at least 10 minutes to allow flavors to meld before serving.

Nutritional Information
Here’s a breakdown of the nutritional content per serving (approximately 1 cup):
- Calories: 320
- Protein: 12g
- Fat: 18g
- Carbohydrates: 30g
- Fiber: 3g
- Sodium: 500mg
This salad is not only delicious but also packed with nutrients, making it a guilt-free option for any meal!
Healthier Alternatives for the Recipe
If you’re looking to make this Tortellini Pasta Salad even healthier, consider these modifications:
- Use Whole Wheat Tortellini: Increases fiber content.
- Add More Veggies: Incorporate spinach, arugula, or roasted vegetables for added nutrients.
- Reduce Oil: Use a lighter dressing made with lemon juice and herbs instead of olive oil.
Serving Suggestions
This Tortellini Pasta Salad is incredibly versatile! Here are some serving ideas:
- As a Side Dish: Perfect alongside grilled chicken or fish.
- Main Course: Add grilled shrimp or chickpeas for extra protein.
- Picnic Favorite: Pack it for a picnic or barbecue; it holds up well without refrigeration for a few hours.
Common Mistakes to Avoid
To ensure your Tortellini Pasta Salad turns out perfectly, avoid these common pitfalls:
- Overcooking the Tortellini: Follow package instructions carefully to prevent mushiness.
- Skipping the Rinse: Always rinse cooked pasta to stop the cooking process.
- Inadequate Seasoning: Taste and adjust the dressing before adding it to the salad.
Storing Tips for the Recipe
To keep your Tortellini Pasta Salad fresh:
- Refrigerate: Store leftovers in an airtight container in the fridge for up to 3 days.
- Avoid Freezing: Pasta salads do not freeze well; the texture may change.
- Prep Ahead: Chop vegetables a day in advance to save time.
Conclusion
In summary, this Tortellini Pasta Salad is a quick, nutritious, and versatile dish that can be enjoyed year-round. With its vibrant flavors and easy preparation, it’s sure to become a staple in your kitchen. Try this recipe today, and don’t forget to share your thoughts in the comments below! Subscribe for more delicious recipes and cooking tips!
FAQs
1. Can I make this salad ahead of time?
Yes, you can prepare the salad a day in advance. Just add the dressing right before serving to keep it fresh.
2. Is this recipe suitable for vegetarians?
Absolutely! This Tortellini Pasta Salad is vegetarian-friendly, especially if you use cheese tortellini.
3. How can I make this salad gluten-free?
Look for gluten-free tortellini options available in many grocery stores.

Tortellini Pasta Salad
Ingredients
- 12 oz Cheese Tortellini (fresh or frozen)
- 1 cup Cherry Tomatoes, halved
- 1 cup Cucumber, diced
- 1/2 cup Red Onion, finely chopped
- 1/2 cup Bell Pepper, diced (any color)
- 1/4 cup Black Olives, sliced
- 1/2 cup Feta Cheese, crumbled
- 1/4 cup Fresh Basil, chopped
- 1/4 cup Olive Oil
- 2 tbsp Red Wine Vinegar
- 1 tsp Italian Seasoning
- Salt and Pepper to taste
Instructions
- Cook the Tortellini: Boil salted water, add tortellini, and cook according to package instructions (3-5 minutes for fresh).
- Prepare the Vegetables: Chop tomatoes, cucumber, red onion, and bell pepper.
- Drain and Cool: Drain tortellini and rinse under cold water.
- Mix the Salad: In a large bowl, combine tortellini, vegetables, olives, and feta.
- Dress the Salad: Whisk together olive oil, red wine vinegar, Italian seasoning, salt, and pepper. Pour over salad and toss gently.
- Serve: Let sit for 10 minutes to meld flavors before serving.