Have you ever wondered why BBQ chicken sandwiches are a go-to favorite for summer cookouts and family gatherings? With their smoky, tangy flavor and tender chicken, they’ve become a staple in many households. In this post, we’ll explore how to create the perfect BBQ chicken sandwich that’s not only delicious but also easy to make. Whether you’re a novice cook or a seasoned chef, this BBQ chicken sandwich recipe will elevate your grilling game.
Ingredients List
To make a mouth-watering BBQ chicken sandwich, you’ll need the following ingredients:
- Chicken Breasts (4 pieces): Boneless and skinless for easy cooking.
- BBQ Sauce (1 cup): Choose your favorite brand or homemade for a personal touch.
- Burger Buns (4): Soft, toasted buns work best.
- Coleslaw (1 cup): Adds a crunchy texture; consider a vinegar-based slaw for a tangy kick.
- Pickles (optional): For an added crunch and flavor.
- Cheddar Cheese (optional): Melted on top for extra richness.
- Olive Oil (1 tablespoon): For grilling the chicken.
- Salt and Pepper: To taste.
Substitutions:
- Use pulled chicken instead of grilled chicken for a different texture.
- Swap out BBQ sauce for hot sauce or mustard for a unique twist.
Step-by-Step Instructions
Step 1: Prepare the Chicken
- Season the Chicken: Drizzle olive oil over the chicken breasts. Sprinkle with salt and pepper to taste.
- Preheat the Grill: Heat your grill to medium-high heat for optimal cooking.
Step 2: Grill the Chicken
- Cook the Chicken: Place the chicken breasts on the grill. Cook for about 6-7 minutes on each side, or until the internal temperature reaches 165°F (75°C).
- Add BBQ Sauce: In the last few minutes of grilling, brush a generous amount of BBQ sauce on each chicken breast, allowing it to caramelize slightly.
Step 3: Assemble the Sandwich
- Toast the Buns: While the chicken is finishing, toast the burger buns on the grill until golden brown.
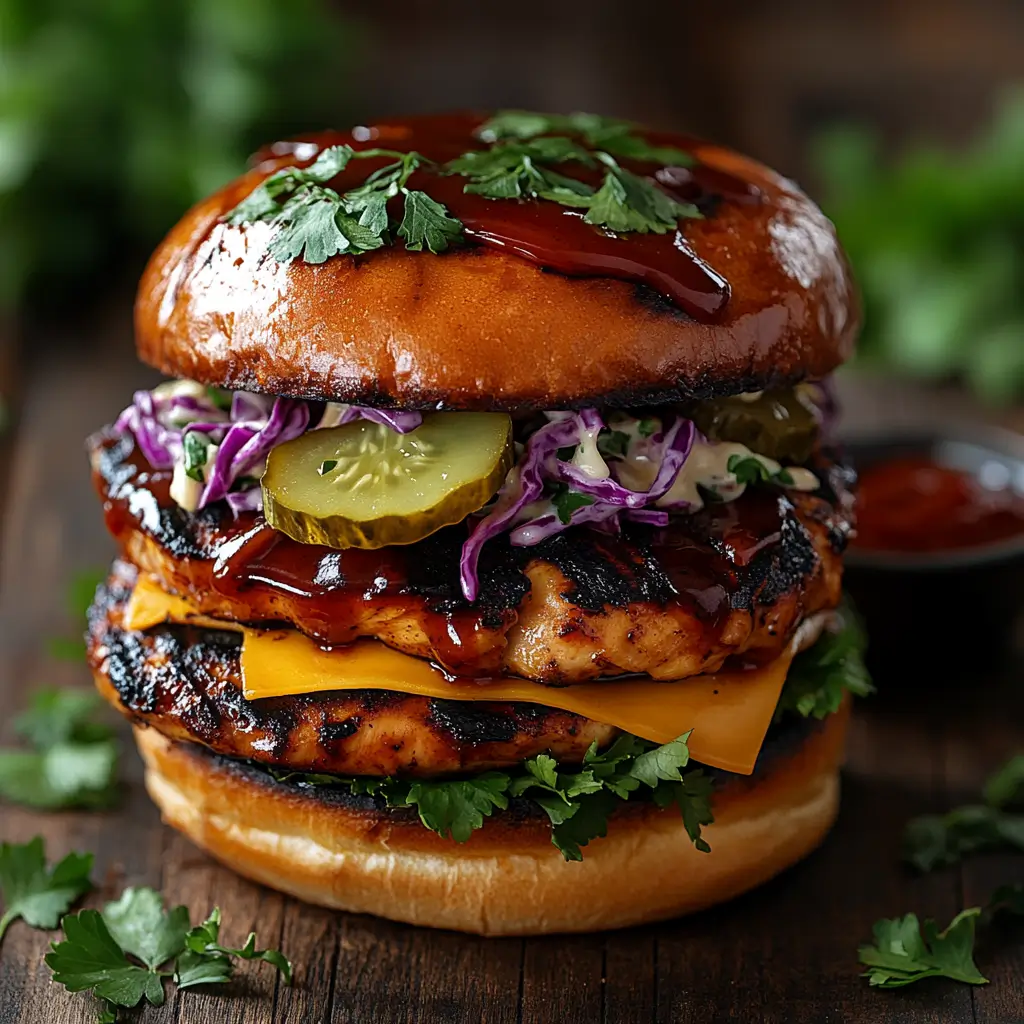
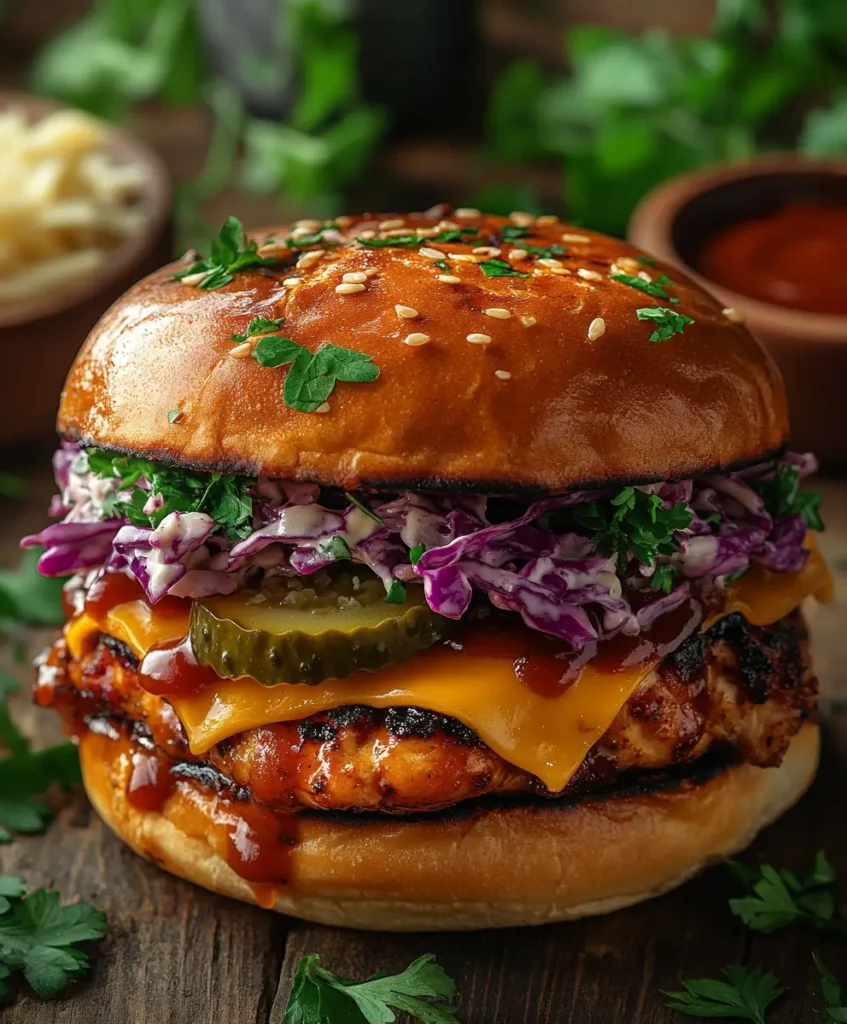
- Layer the Ingredients: Place the grilled chicken on the bottom half of each bun. Top with coleslaw, additional BBQ sauce, and pickles if desired.
- Add Cheese: If using, place a slice of cheddar cheese on top of the chicken for a melty finish.
Step 4: Serve and Enjoy
- Top with the Bun: Cap it off with the top half of the bun.
- Serve Immediately: Enjoy your BBQ chicken sandwich with your favorite sides!
Nutritional Information
Here’s a breakdown of the nutritional content per serving:
| Nutrient | Amount per Serving |
|---|---|
| Calories | 450 |
| Protein | 30g |
| Carbohydrates | 40g |
| Fat | 18g |
| Fiber | 2g |
Data sourced from standard nutritional databases.
Healthier Alternatives for the Recipe
- Chicken Thighs: Use skinless chicken thighs for a juicier option.
- Whole Wheat Buns: Opt for whole wheat buns to increase fiber content.
- Greek Yogurt Slaw: Replace mayonnaise in coleslaw with Greek yogurt for a healthier twist.
- Low-Sugar BBQ Sauce: Choose a low-sugar BBQ sauce to reduce calories and sugar intake.
Serving Suggestions
- Pair with Sides: Serve with sweet potato fries, corn on the cob, or a fresh garden salad for a balanced meal.
- Add a Twist: Try adding avocado slices or jalapeños for an extra kick.
- Make it a Platter: Create a BBQ platter with different meats and sides for a festive gathering.
Common Mistakes to Avoid
- Overcooking the Chicken: Use a meat thermometer to ensure perfect doneness without drying out the chicken.
- Skipping the Marinade: Marinate the chicken in BBQ sauce for at least 30 minutes before grilling for deeper flavor.
- Not Toasting the Buns: Toasting enhances the flavor and prevents the buns from becoming soggy.
Storing Tips for the Recipe
- Leftover Chicken: Store any leftover grilled chicken in an airtight container in the refrigerator for up to 3 days.
- Freezing Options: Freeze cooked chicken in individual portions for easy future meals.
- Prepping Ahead: Prepare the coleslaw a day in advance to save time on cooking day.
Conclusion
In summary, the BBQ chicken sandwich is a quick, flavorful, and versatile dish that can be enjoyed by everyone. With easy preparation and customizable options, it’s perfect for any occasion. Try this recipe today, and don’t forget to share your feedback in the comments section below! Subscribe for more delicious recipes and cooking tips.
FAQs
Q1: Can I use other types of meat for this recipe?
A: Yes! You can substitute chicken with turkey, pork, or even plant-based alternatives for a different flavor profile.
Q2: How can I make this recipe gluten-free?
A: Use gluten-free buns and ensure your BBQ sauce is gluten-free.
Q3: Can I make this sandwich in the oven?
A: Absolutely! Preheat your oven to 375°F (190°C) and bake the seasoned chicken for about 25-30 minutes, basting with BBQ sauce halfway through.

BBQ Chicken Sandwich
Ingredients
- Chicken Breasts: 4 pieces (boneless, skinless)
- BBQ Sauce: 1 cup (your favorite brand or homemade)
- Burger Buns: 4 (soft, toasted)
- Coleslaw: 1 cup (for crunch)
- Pickles: (optional, for added flavor)
- Cheddar Cheese: (optional, melted)
- Olive Oil: 1 tablespoon
- Salt and Pepper: to taste
Instructions
Prepare the Chicken:
Drizzle olive oil over chicken breasts. Season with salt and pepper.
Preheat the grill to medium-high heat.
Grill the Chicken:
Grill chicken for 6-7 minutes on each side until cooked through (internal temp 165°F/75°C).
Brush BBQ sauce on chicken in the last few minutes of grilling.
Assemble the Sandwich:
Toast burger buns on the grill.
Place grilled chicken on the bottom bun; top with coleslaw, extra BBQ sauce, and pickles.
Add melted cheddar cheese if desired.
Serve:
Cap with the top bun and enjoy immediately!
Notes
- Leftovers: Store leftover chicken in an airtight container for up to 3 days.
- Freezing: Freeze cooked chicken in portions for future meals.
- Customizations: Use turkey or plant-based alternatives for different flavors.