Introduction
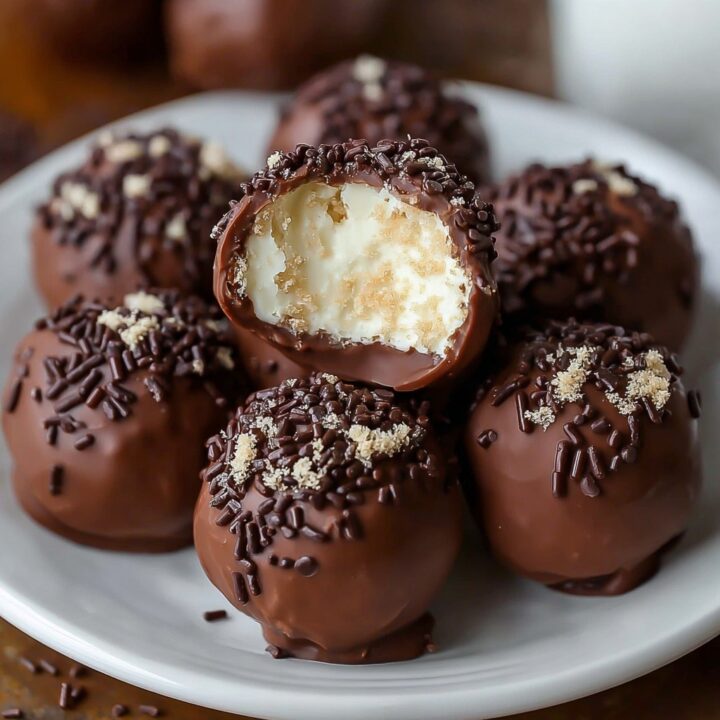
Chocolate Covered Cheesecake Balls are a delectable treat that combines the creamy richness of cheesecake with a luscious chocolate coating. These bite-sized desserts are perfect for parties, holidays, or any time you crave a sweet indulgence. In this post, we’ll guide you through making these delightful cheesecake balls that are sure to impress!
Ingredients List
For the Cheesecake Filling:
- Cream Cheese: 8 oz (softened)
- Powdered Sugar: ½ cup
- Vanilla Extract: 1 teaspoon
- Graham Cracker Crumbs: ½ cup
For the Chocolate Coating:
- Semi-Sweet Chocolate Chips: 1 cup
- Coconut Oil: 1 tablespoon (optional, for smoother melting)
For Garnish (optional):
- Crushed Graham Crackers: for rolling
- Chocolate Sprinkles: for decoration
Timing
Preparing Chocolate Covered Cheesecake Balls takes approximately 15 minutes of prep time and 30 minutes of chilling time, plus additional time for coating.
Step-by-Step Instructions
1. Make the Cheesecake Filling
- Mix Ingredients: In a mixing bowl, combine the softened cream cheese, powdered sugar, and vanilla extract. Beat with an electric mixer until smooth and creamy.
- Add Graham Cracker Crumbs: Gently fold in the graham cracker crumbs until well combined.
2. Form the Cheesecake Balls
- Chill the Mixture: Cover the cheesecake mixture and refrigerate for about 30 minutes to firm up.
- Shape the Balls: Once chilled, use a small cookie scoop or your hands to form the mixture into small balls (about 1 inch in diameter). Place them on a parchment-lined baking sheet.
3. Freeze the Cheesecake Balls
- Freeze: Place the formed cheesecake balls in the freezer for about 15-20 minutes to firm up further. This will make them easier to coat in chocolate.
4. Prepare the Chocolate Coating
- Melt Chocolate: In a microwave-safe bowl, combine the semi-sweet chocolate chips and coconut oil (if using). Microwave in 30-second intervals, stirring in between, until the chocolate is completely melted and smooth.
5. Coat the Cheesecake Balls
- Dip the Balls: Using a fork or a toothpick, dip each cheesecake ball into the melted chocolate, ensuring it’s fully coated. Allow any excess chocolate to drip off.
- Place on Baking Sheet: Return the coated balls to the parchment-lined baking sheet.
6. Garnish (Optional)
- Add Toppings: While the chocolate is still wet, you can sprinkle crushed graham crackers or chocolate sprinkles on top for added decoration.
7. Chill and Serve
- Chill Again: Place the chocolate-covered cheesecake balls in the refrigerator for about 15-20 minutes to set the chocolate.
- Enjoy: Serve chilled and enjoy the delightful combination of cheesecake and chocolate!

Notes
- Storage: Store the cheesecake balls in an airtight container in the refrigerator for up to 1 week.
- Substitutions: You can use white chocolate or milk chocolate for the coating if desired.
- Common Mistakes: Make sure the cheesecake mixture is well-chilled before forming the balls to prevent them from becoming too soft.
Nutritional Information
- Calories: Approximately 150 per ball (based on 12 balls)
- Fat: 10g
- Protein: 2g
- Carbohydrates: 14g
- Sugar: 10g
| Nutritional Value | Per Ball (12 balls) |
|---|---|
| Calories | 150 |
| Total Fat | 10g |
| Protein | 2g |
| Carbohydrates | 14g |
| Sugar | 10g |
Healthier Alternatives for the Recipe
- Reduced Sugar: Use less powdered sugar or a sugar substitute to lower the sweetness.
- Low-Fat Cream Cheese: Substitute with low-fat or light cream cheese for a lighter version.
Serving Suggestions
Serve Chocolate Covered Cheesecake Balls as a delightful dessert at parties, holiday gatherings, or as a sweet treat for yourself!
Common Mistakes to Avoid
- Not Chilling Enough: Ensure the cheesecake mixture is well-chilled before shaping the balls to maintain their form.
- Skipping the Freezing Step: Freezing the balls before coating makes the process much easier and prevents them from falling apart.
Storing Tips for the Recipe
Store leftover cheesecake balls in an airtight container in the refrigerator. They can also be frozen for up to 2 months; just thaw before serving.
Conclusion
Chocolate Covered Cheesecake Balls are a delicious and fun dessert that combines the best of cheesecake and chocolate. They are easy to make and perfect for any occasion. We invite you to try this recipe, share your experiences in the comments, and subscribe for more delicious updates!
FAQs
1. Can I make these cheesecake balls ahead of time?
Yes, you can prepare them a day in advance and store them in the refrigerator.
2. How long do these cheesecake balls last?
They can be stored in the refrigerator for up to 1 week.
3. Can I use different flavors for the filling?
Absolutely! You can add flavorings like lemon zest, chocolate chips, or fruit purée to the cheesecake mixture.
4. What can I serve with these cheesecake balls?
They pair wonderfully with coffee, tea, or a scoop of ice cream for a delightful dessert experience.
5. Are these cheesecake balls suitable for kids?
Yes, these treats are kid-friendly and can be a fun activity for children to help make!
Chocolate Covered Cheesecake Balls
Ingredients
- For the Cheesecake Filling:
- * Cream Cheese: 8 oz (softened)
- * Powdered Sugar: ½ cup
- * Vanilla Extract: 1 teaspoon
- * Graham Cracker Crumbs: ½ cup
- For the Chocolate Coating:
- * Semi-Sweet Chocolate Chips: 1 cup
- * Coconut Oil: 1 tablespoon (optional, for smoother melting)
- For Garnish (optional):
- * Crushed Graham Crackers: for rolling
- * Chocolate Sprinkles: for decoration
Instructions
1. Make the Cheesecake Filling
- Mix Ingredients: In a mixing bowl, combine the softened cream cheese, powdered sugar, and vanilla extract. Beat with an electric mixer until smooth and creamy.
- Add Graham Cracker Crumbs: Gently fold in the graham cracker crumbs until well combined.
2. Form the Cheesecake Balls
- Chill the Mixture: Cover the cheesecake mixture and refrigerate for about 30 minutes to firm up.
- Shape the Balls: Once chilled, use a small cookie scoop or your hands to form the mixture into small balls (about 1 inch in diameter). Place them on a parchment-lined baking sheet.
3. Freeze the Cheesecake Balls
- Freeze: Place the formed cheesecake balls in the freezer for about 15-20 minutes to firm up further. This will make them easier to coat in chocolate.
4. Prepare the Chocolate Coating
- Melt Chocolate: In a microwave-safe bowl, combine the semi-sweet chocolate chips and coconut oil (if using). Microwave in 30-second intervals, stirring in between, until the chocolate is completely melted and smooth.
5. Coat the Cheesecake Balls
- Dip the Balls: Using a fork or a toothpick, dip each cheesecake ball into the melted chocolate, ensuring it’s fully coated. Allow any excess chocolate to drip off.
- Place on Baking Sheet: Return the coated balls to the parchment-lined baking sheet.
6. Garnish (Optional)
- Add Toppings: While the chocolate is still wet, you can sprinkle crushed graham crackers or chocolate sprinkles on top for added decoration.
7. Chill and Serve
- Chill Again: Place the chocolate-covered cheesecake balls in the refrigerator for about 15-20 minutes to set the chocolate.
- Enjoy: Serve chilled and enjoy the delightful combination of cheesecake and chocolate!