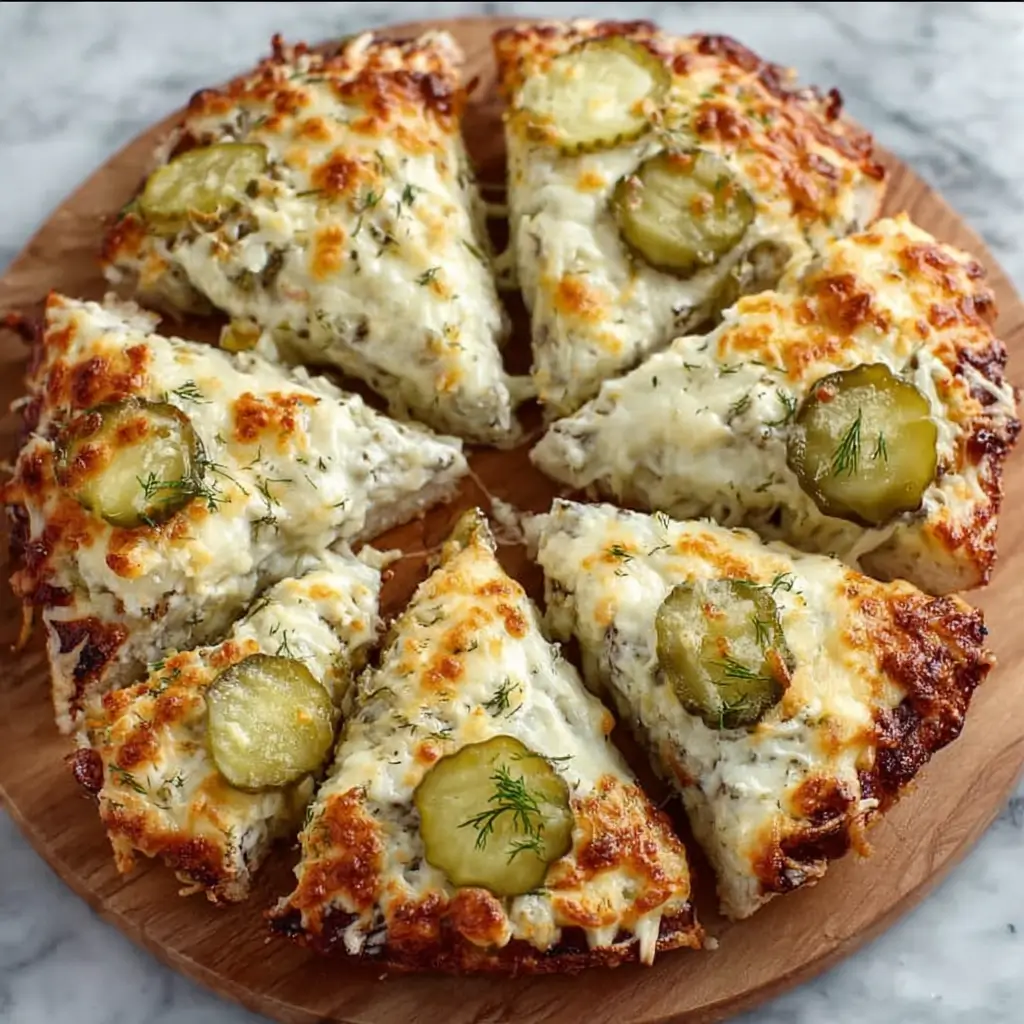
Have you ever wondered how to elevate your bread game with a bold and unexpected flavor? According to a recent culinary survey, 68% of home bakers are seeking unique recipes that combine traditional techniques with modern flavors. Enter dill pickle focaccia—a delightful fusion that challenges the conventional notions of focaccia by infusing it with the tangy, savory goodness of dill pickles. This recipe not only satisfies your cravings but also sparks curiosity among your guests, making it a perfect addition to any meal or gathering.
Ingredients List
Creating the perfect dill pickle focaccia requires a few simple ingredients, each playing a crucial role in achieving that irresistible flavor and texture. Here’s what you’ll need:
Main Ingredients:
- 4 cups all-purpose flour
The foundation of your focaccia, providing structure and chewiness. - 1 ½ cups warm water (about 110°F)
Activates the yeast for a perfect rise. - 2 teaspoons active dry yeast
The leavening agent that gives the bread its airy texture. - 2 teaspoons salt
Enhances flavor and strengthens the dough. - 1 tablespoon sugar
Feeds the yeast and adds a hint of sweetness. - 1/4 cup olive oil
For richness and flavor, plus extra for drizzling. - 1 cup dill pickles (chopped)
The star ingredient, adding tang and crunch. - 1 tablespoon dill (fresh or dried)
Enhances the dill flavor and adds aromatic notes.
Potential Substitutions:
- Flour: Whole wheat flour can be used for a healthier option, though it may change the texture slightly.
- Pickles: If you prefer a milder flavor, use bread-and-butter pickles instead of dill pickles.
- Dill: Fresh herbs like thyme or rosemary can be substituted for a different flavor profile.
Step-by-Step Instructions
Step 1: Prepare the Dough
In a large mixing bowl, combine the warm water, sugar, and yeast. Let it sit for about 5 minutes until frothy. This indicates that the yeast is active. Then, add the flour, salt, and olive oil. Mix until a shaggy dough forms.
Tip: Use a wooden spoon or your hands to combine the ingredients effectively.
Step 2: Knead the Dough
Transfer the dough to a lightly floured surface and knead for about 8-10 minutes until smooth and elastic. If the dough is sticky, sprinkle a little more flour as needed.
Tip: You can also use a stand mixer with a dough hook for this step, which saves time and effort.
Step 3: First Rise
Place the kneaded dough in a lightly greased bowl, cover it with a damp cloth, and let it rise in a warm place for about 1 hour or until it has doubled in size.
Tip: An oven with the light on can create a warm environment for rising.
Step 4: Incorporate Dill Pickles
Once the dough has risen, gently punch it down to release the air. Fold in the chopped dill pickles and dill, ensuring they are evenly distributed throughout the dough.
Tip: Be gentle to maintain the dough’s airiness.
Step 5: Shape and Second Rise
Transfer the dough to a greased baking sheet or a 9×13-inch pan. Stretch and shape it to fit the pan. Cover it again and let it rise for another 30 minutes.
Tip: Use your fingers to create dimples in the dough for that classic focaccia texture.
Step 6: Bake
Preheat your oven to 425°F (220°C). Drizzle the top of the dough with olive oil and sprinkle with additional salt and dill if desired. Bake for 20-25 minutes or until golden brown.
Tip: Rotate the pan halfway through baking for even cooking.
Step 7: Cool and Serve
Once baked, remove the focaccia from the oven and let it cool in the pan for about 10 minutes before transferring it to a wire rack to cool completely.
Tip: Serve warm or at room temperature, sliced into squares or wedges.
Nutritional Information
Here’s a breakdown of the nutritional content for one serving (1 piece) of dill pickle focaccia:
| Nutrient | Amount per Serving |
|---|---|
| Calories | 190 |
| Total Fat | 8g |
| Saturated Fat | 1g |
| Carbohydrates | 25g |
| Sugars | 1g |
| Protein | 4g |
| Fiber | 1g |
Data Insights
This dill pickle focaccia is a flavorful addition to your diet, providing a balance of carbohydrates and healthy fats while delivering a unique taste experience.
Healthier Alternatives for the Recipe
If you’re looking to make this dill pickle focaccia even healthier, consider these modifications:
- Use Whole Wheat Flour: This increases fiber content and adds more nutrients.
- Reduce Oil: Use less olive oil or substitute with a lighter oil to cut down on calories.
- Add More Vegetables: Incorporate grated zucchini or spinach for added nutrition without sacrificing flavor.
Serving Suggestions
This dill pickle focaccia is versatile and can be served in various ways:
- As an Appetizer: Pair it with a creamy dip or hummus for a delicious starter.
- With Soups and Salads: Serve alongside your favorite soup or salad for a complete meal.
- For Sandwiches: Use it as a base for sandwiches, layering with meats, cheeses, and additional pickles.
Personalized Tips
For an extra flavor boost, try adding a sprinkle of garlic powder or red pepper flakes before baking!
Common Mistakes to Avoid
Creating the perfect dill pickle focaccia is simple, but here are some common pitfalls to avoid:
- Not Activating the Yeast: Ensure your yeast is fresh and the water is at the right temperature to activate it properly.
- Overworking the Dough: Knead just enough to develop gluten without overworking it, which can lead to a tough texture.
- Skipping the Second Rise: Allowing the dough to rise a second time is crucial for achieving a light and airy focaccia.
Storing Tips for the Recipe
To keep your dill pickle focaccia fresh and flavorful:
- Refrigeration: Store leftovers in an airtight container in the fridge for up to 3 days.
- Freezing: You can freeze the focaccia for up to 3 months. Wrap it tightly in plastic wrap and foil before freezing.
- Reheating: To enjoy leftovers, reheat in the oven at 350°F (175°C) for about 10 minutes to restore crispness.
Conclusion
In summary, this dill pickle focaccia is a delightful twist on traditional bread, combining the savory tang of dill pickles with the fluffy texture of focaccia. It’s perfect for any occasion, whether as an appetizer, side dish, or main event. We invite you to try this recipe and share your feedback in the comments section or leave a review. Don’t forget to subscribe for more delicious updates!
FAQs
Can I use other types of pickles?
Yes! You can use bread-and-butter pickles for a sweeter flavor or even spicy pickles for a kick.
Is this focaccia suitable for freezing?
Absolutely! This focaccia freezes well. Just wrap it tightly and store it for up to 3 months.
Can I make this recipe vegan?
Yes! This recipe is naturally vegan; just ensure that any additional toppings or dips are also plant-based.

Dill Pickle Focaccia
Ingredients
- 4 cups all-purpose flour
- Provides structure and chewiness.
- 1 ½ cups warm water (about 110°F)
- Activates the yeast for a perfect rise.
- 2 teaspoons active dry yeast
- Leavening agent for airy texture.
- 2 teaspoons salt
- Enhances flavor and strengthens the dough.
- 1 tablespoon sugar
- Feeds the yeast and adds sweetness.
- 1/4 cup olive oil
- Adds richness and flavor.
- 1 cup dill pickles (chopped)
- Key ingredient for tang and crunch.
- 1 tablespoon dill (fresh or dried)
- Enhances the dill flavor.
Instructions
- Prepare the Dough: Mix warm water, sugar, and yeast. Let sit for 5 minutes. Add flour, salt, and olive oil; mix until shaggy.
- Knead the Dough: Knead on a floured surface for 8-10 minutes until smooth.
- First Rise: Place in a greased bowl, cover, and let rise for 1 hour.
- Incorporate Dill Pickles: Punch down the dough and fold in chopped dill pickles and dill.
- Shape and Second Rise: Transfer to a greased pan, shape, cover, and let rise for 30 minutes.
- Bake: Preheat oven to 425°F (220°C), drizzle with olive oil, sprinkle salt, and bake for 20-25 minutes.
- Cool and Serve: Let cool for 10 minutes before slicing.