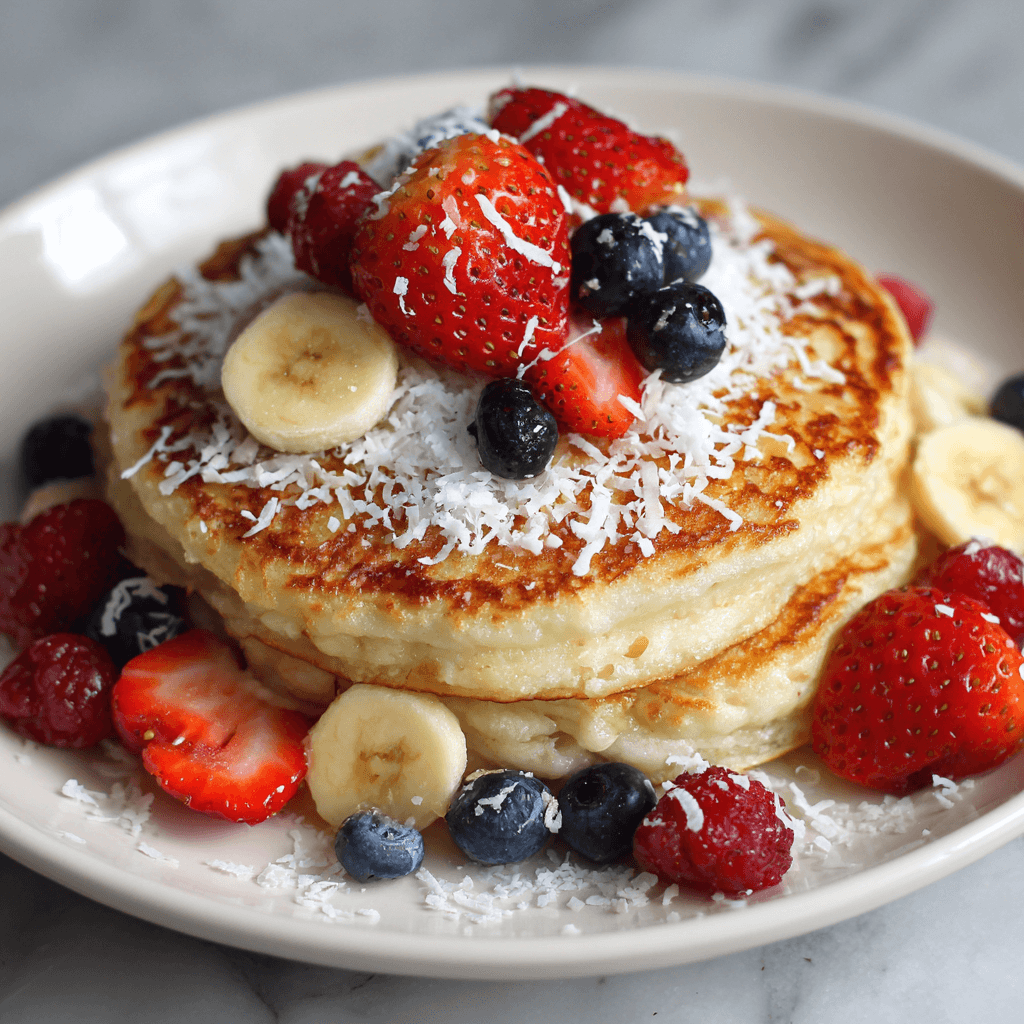
Fluffy Coconut Cream Pancakes are a delightful breakfast treat that combines the rich flavor of coconut with the lightness of fluffy pancakes. These pancakes are perfect for a weekend brunch or a special breakfast, and they can be topped with your favorite fruits and syrups.
Ingredients
- 1 cup all-purpose flour
- 1 tablespoon baking powder
- 1/4 teaspoon salt
- 1/4 cup shredded coconut (unsweetened)
- 1 tablespoon sugar (optional)
- 1 cup coconut milk (or regular milk)
- 1 large egg
- 2 tablespoons melted coconut oil (or vegetable oil)
- 1 teaspoon vanilla extract
- Extra shredded coconut (for garnish, optional)
- Fresh fruit (such as bananas or berries, for topping)
- Maple syrup (for serving)
Timing
Making Fluffy Coconut Cream Pancakes takes about 10 minutes for preparation and 15 minutes for cooking.
Instructions
Step 1: Prepare the Batter
- Mix Dry Ingredients: In a large bowl, whisk together the flour, baking powder, salt, shredded coconut, and sugar (if using).
- Combine Wet Ingredients: In another bowl, mix the coconut milk, egg, melted coconut oil, and vanilla extract until well combined.
- Combine Mixtures: Pour the wet ingredients into the dry ingredients and stir gently until just combined. Be careful not to overmix; a few lumps are okay.
Step 2: Cook the Pancakes
- Heat the Pan: Preheat a non-stick skillet or griddle over medium heat. Lightly grease with a bit of coconut oil or cooking spray.
- Pour Batter: Pour about 1/4 cup of batter onto the skillet for each pancake. Cook until bubbles form on the surface and the edges look set, about 2-3 minutes.
- Flip and Cook: Flip the pancakes and cook for an additional 2-3 minutes until golden brown and cooked through. Repeat with the remaining batter.
Step 3: Serve
- Serve Warm: Stack the pancakes on plates and top with extra shredded coconut, fresh fruit, and maple syrup.

Nutritional Information
Here’s a quick overview of the nutritional content of Fluffy Coconut Cream Pancakes (per serving, based on 4 servings):
| Nutrient | Amount per Serving |
|---|---|
| Calories | 220 |
| Protein | 4g |
| Fat | 9g |
| Carbohydrates | 32g |
| Fiber | 2g |
| Sugar | 3g |
Tips for Customization
- Add-ins: Mix in chocolate chips or nuts for added flavor and texture.
- Coconut Flavor: Use coconut extract for an extra boost of coconut flavor.
- Gluten-Free Option: Substitute all-purpose flour with a gluten-free flour blend.
Conclusion
Fluffy Coconut Cream Pancakes are a delightful way to enjoy breakfast, offering a tropical twist on a classic dish. They are light, fluffy, and full of coconut flavor, making them perfect for any pancake lover!

Fluffy Coconut Cream Pancakes Recipe
Ingredients
- • 1 cup all-purpose flour
- • 1 tablespoon baking powder
- • 1/4 teaspoon salt
- • 1/4 cup shredded coconut (unsweetened)
- • 1 tablespoon sugar (optional)
- • 1 cup coconut milk (or regular milk)
- • 1 large egg
- • 2 tablespoons melted coconut oil (or vegetable oil)
- • 1 teaspoon vanilla extract
- • Extra shredded coconut (for garnish, optional)
- • Fresh fruit (such as bananas or berries, for topping)
- • Maple syrup (for serving)
Instructions
- In a large bowl, whisk together the flour, baking powder, salt, shredded coconut, and sugar (if using).
- In another bowl, mix the coconut milk, egg, melted coconut oil, and vanilla extract until well combined.
- Pour the wet ingredients into the dry ingredients and stir gently until just combined. Be careful not to overmix; a few lumps are okay.
- Preheat a non-stick skillet or griddle over medium heat. Lightly grease with a bit of coconut oil or cooking spray.
- Pour about 1/4 cup of batter onto the skillet for each pancake. Cook until bubbles form on the surface and the edges look set, about 2–3 minutes.
- Flip the pancakes and cook for an additional 2–3 minutes until golden brown and cooked through. Repeat with the remaining batter.
- Stack the pancakes on plates and top with extra shredded coconut, fresh fruit, and maple syrup.
Step 1: Prepare the Batter
Step 2: Cook the Pancakes
Step 3: Serve