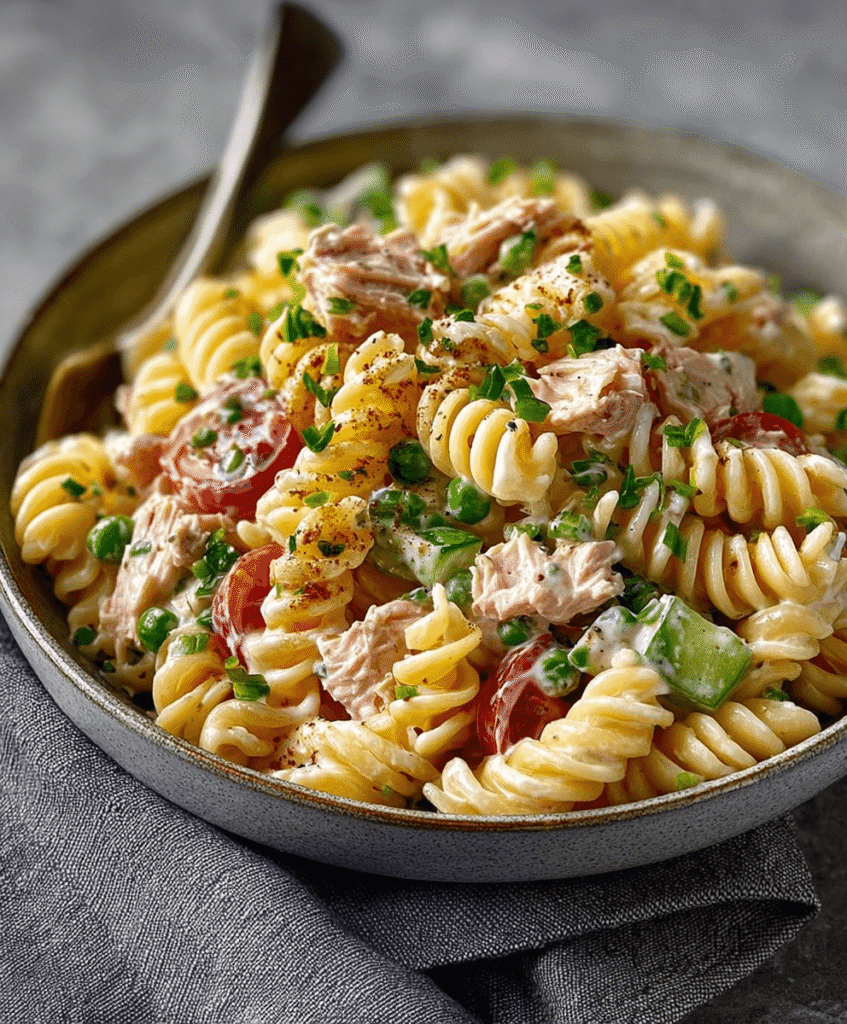
Easy Tuna Pasta Salad is a quick and satisfying dish that combines tender pasta, flaky tuna, and fresh vegetables, all tossed in a creamy dressing. This recipe is perfect for lunch, picnics, or potlucks, and can be made in just a few minutes!
Ingredients
- 8 ounces pasta (such as rotini, fusilli, or elbow macaroni)
- 1 can (15 ounces) tuna (drained, preferably in water or olive oil)
- 1 cup cherry tomatoes (halved)
- 1/2 cup cucumber (diced)
- 1/4 cup red onion (finely chopped)
- 1/2 cup frozen peas (thawed)
- 1/2 cup mayonnaise
- 2 tablespoons Greek yogurt (or more mayonnaise)
- 1 tablespoon lemon juice
- 1 teaspoon Dijon mustard
- Salt and pepper (to taste)
- Fresh parsley (chopped, for garnish)
Timing
Making Easy Tuna Pasta Salad takes about 10 minutes for preparation and 10-12 minutes for cooking the pasta.
Instructions
Step 1: Cook the Pasta
- Boil Pasta: In a large pot of salted boiling water, cook the pasta according to package instructions until al dente. Drain and rinse under cold water to cool.
Step 2: Prepare the Salad
- Combine Ingredients: In a large mixing bowl, combine the drained tuna, cherry tomatoes, cucumber, red onion, and thawed peas.
- Add Pasta: Add the cooled pasta to the bowl with the other ingredients.
Step 3: Make the Dressing
- Mix Dressing: In a separate small bowl, whisk together the mayonnaise, Greek yogurt, lemon juice, Dijon mustard, salt, and pepper until smooth.
Step 4: Combine and Serve
- Toss Salad: Pour the dressing over the pasta mixture and toss gently to combine, ensuring everything is evenly coated.
- Garnish: Garnish with chopped fresh parsley before serving.
Nutritional Information
Here’s a quick overview of the nutritional content of Easy Tuna Pasta Salad (per serving, based on 4 servings):
| Nutrient | Amount per Serving |
|---|---|
| Calories | 320 |
| Protein | 18g |
| Fat | 15g |
| Carbohydrates | 35g |
| Fiber | 3g |
| Sugar | 2g |
Tips for Customization
- Add More Veggies: Include bell peppers, carrots, or celery for added crunch and nutrition.
- Switch Up the Dressing: Use vinaigrette instead of mayonnaise for a lighter option.
- Different Proteins: Substitute tuna with canned chicken or chickpeas for a different flavor profile.
Storage Instructions
Store any leftovers in an airtight container in the refrigerator for up to 3 days. The flavors will meld together even more after sitting, making it even tastier!
Conclusion
Easy Tuna Pasta Salad is a versatile and flavorful dish that’s perfect for any occasion. With its combination of pasta, tuna, and fresh vegetables, this salad is not only quick to prepare but also a satisfying meal that everyone will enjoy!

Easy Tuna Pasta Salad Recipe
Ingredients
- • 8 ounces pasta (such as rotini, fusilli, or elbow macaroni)
- • 1 can (15 ounces) tuna (drained, preferably in water or olive oil)
- • 1 cup cherry tomatoes (halved)
- • 1/2 cup cucumber (diced)
- • 1/4 cup red onion (finely chopped)
- • 1/2 cup frozen peas (thawed)
- • 1/2 cup mayonnaise
- • 2 tablespoons Greek yogurt (or more mayonnaise)
- • 1 tablespoon lemon juice
- • 1 teaspoon Dijon mustard
- • Salt and pepper (to taste)
- • Fresh parsley (chopped, for garnish)
Instructions
- In a large pot of salted boiling water, cook the pasta according to package instructions until al dente.
- Drain and rinse under cold water to cool.
- In a large mixing bowl, combine the drained tuna, cherry tomatoes, cucumber, red onion, and thawed peas.
- Add the cooled pasta to the bowl with the other ingredients.
- In a separate small bowl, whisk together the mayonnaise, Greek yogurt, lemon juice, Dijon mustard, salt, and pepper until smooth.
- Pour the dressing over the pasta mixture and toss gently to combine, ensuring everything is evenly coated.
- Garnish with chopped fresh parsley before serving.
Step 1: Cook the Pasta
Step 2: Prepare the Salad
Step 3: Make the Dressing
Step 4: Combine and Serve