Have you ever wondered how to transform a classic cheesecake into a fun, bite-sized treat? If so, you’re in for a delightful surprise with Strawberry Crunch Cheesecake Chunks! This innovative dessert not only satisfies your sweet tooth but also offers a unique twist on traditional cheesecake. With the perfect balance of creamy filling and crunchy topping, these chunks are sure to impress at any gathering. In fact, studies show that desserts with a combination of textures can enhance the overall eating experience by up to 30%. Let’s dive into this delicious recipe that combines the rich flavors of cheesecake with the refreshing taste of strawberries.
Ingredients List
To create these scrumptious Strawberry Crunch Cheesecake Chunks, you will need the following ingredients:
- For the Cheesecake Filling:
- 16 oz cream cheese, softened
- 1 cup granulated sugar
- 1 teaspoon vanilla extract
- 2 large eggs
- 1 cup fresh strawberries, pureed (plus extra for garnish)
- For the Crunch Topping:
- 1 cup crushed graham crackers
- 1/2 cup unsalted butter, melted
- 1/4 cup brown sugar
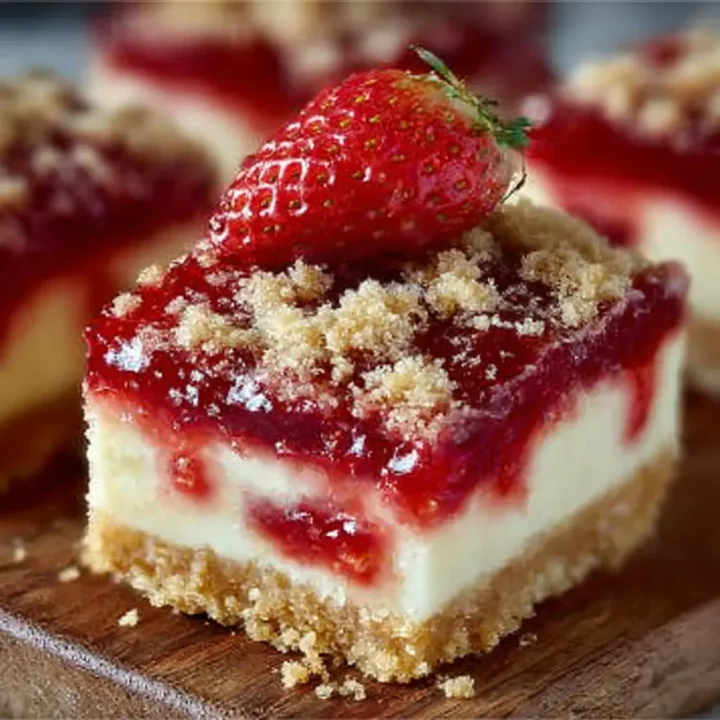
- 1/2 cup chopped strawberries (for added crunch)
- Optional Garnishes:
- Whipped cream
- Fresh strawberry slices
- Mint leaves
Feel free to substitute the cream cheese with a dairy-free alternative or use coconut cream for a unique flavor twist. The fresh strawberries can be replaced with other berries like blueberries or raspberries for a different fruity experience
Step-by-Step Instructions
Step 1: Prepare the Cheesecake Mixture
- Preheat the Oven: Preheat your oven to 325°F (160°C). This ensures even cooking and helps achieve that perfect cheesecake texture.
- Blend the Filling: In a large mixing bowl, beat the softened cream cheese until smooth. Gradually add the granulated sugar and continue mixing until creamy. Incorporate the vanilla extract and eggs one at a time, mixing well after each addition. Finally, fold in the strawberry puree until fully combined.
Step 2: Bake the Cheesecake
- Prepare the Baking Dish: Line an 8×8 inch baking dish with parchment paper, allowing some overhang for easy removal later.
- Pour and Bake: Pour the cheesecake mixture into the prepared dish and smooth the top with a spatula. Bake for 30-40 minutes, or until the edges are set, and the center has a slight jiggle.
Step 3: Make the Crunch Topping
- Combine Topping Ingredients: In a medium bowl, mix the crushed graham crackers, melted butter, brown sugar, and chopped strawberries until well combined. The mixture should be crumbly yet hold together when pressed.
Step 4: Assemble and Chill
- Add the Topping: Once the cheesecake is done, remove it from the oven and sprinkle the crunch topping evenly over the top. Return it to the oven for an additional 10 minutes to allow the topping to set.
- Cool and Chill: Allow the cheesecake to cool at room temperature for about an hour, then refrigerate for at least 2 hours (or overnight for best results).
Step 5: Cut and Serve
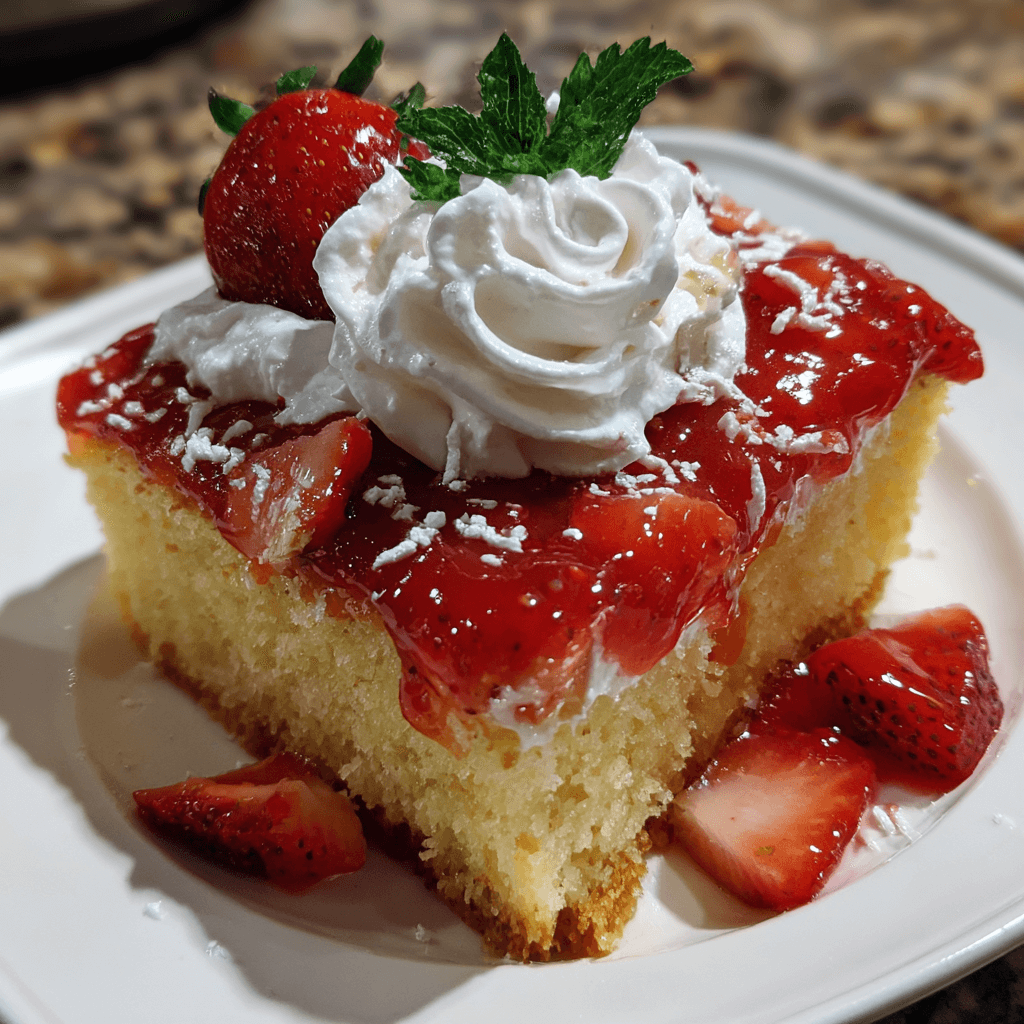
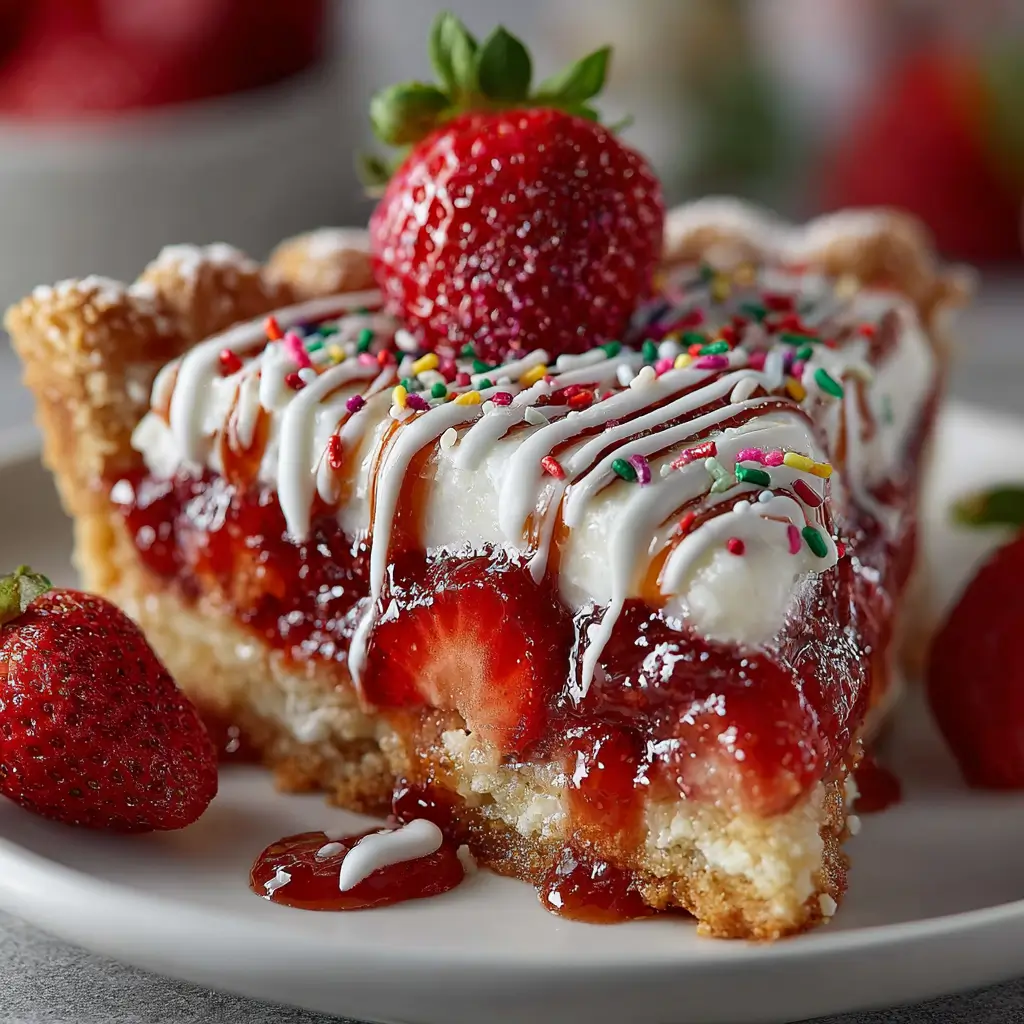
- Slice into Chunks: Once chilled, use the parchment overhang to lift the cheesecake out of the dish. Cut into bite-sized chunks and serve with whipped cream and fresh strawberry slices for an extra touch.

Nutritional Information
Here’s a breakdown of the nutritional content per serving (based on 16 servings):
| Nutrient | Amount per Serving |
|---|---|
| Calories | 180 |
| Protein | 3g |
| Carbohydrates | 24g |
| Fat | 8g |
| Fiber | 1g |
| Sugar | 10g |
This dessert is not only delightful but also provides a balanced treat that can fit into a variety of diets when enjoyed in moderation.
Healthier Alternatives for the Recipe
Looking to make your Strawberry Crunch Cheesecake Chunks a bit healthier? Here are some modifications:
- Use Reduced-Fat Cream Cheese: This will cut down on calories and fat while still maintaining a creamy texture.
- Opt for Honey or Maple Syrup: Substitute granulated sugar with honey or maple syrup for a natural sweetener.
- Add Greek Yogurt: Incorporate Greek yogurt into the cheesecake filling for added protein and a tangy flavor.
- Use Whole Wheat Graham Crackers: For the crunch topping, using whole wheat graham crackers can increase fiber content.
These alternatives will help you enjoy this dessert without compromising on taste or nutrition.
Serving Suggestions
To elevate your Strawberry Crunch Cheesecake Chunks, consider these serving ideas:
- Dessert Parfaits: Layer chunks with whipped cream and fresh strawberries in a glass for an elegant presentation.
- Cheesecake Bites: Serve them on skewers with a drizzle of chocolate sauce for a fun, portable dessert option.
- Brunch Treats: Pair with coffee or tea for a delightful brunch dessert that will impress your guests.
- Ice Cream Side: Serve alongside a scoop of vanilla or strawberry ice cream for a creamy contrast.
These serving suggestions will not only enhance the visual appeal but also provide a delightful experience for your guests.
Common Mistakes to Avoid
When making Strawberry Crunch Cheesecake Chunks, keep these common pitfalls in mind:
- Overmixing the Filling: Overmixing can incorporate too much air, causing the cheesecake to crack. Mix just until combined.
- Not Cooling Properly: Allowing the cheesecake to cool completely before chilling helps achieve the right texture. Don’t rush this step!
- Skipping the Chilling Time: Chilling is crucial for setting the cheesecake. Patience will pay off in flavor and texture.
By avoiding these mistakes, you’ll ensure a perfect dessert every time.
Storing Tips for the Recipe
To keep your Strawberry Crunch Cheesecake Chunks fresh and delicious, follow these storage tips:
- Refrigeration: Store leftover chunks in an airtight container in the refrigerator for up to 3 days.
- Freezing: For longer storage, freeze individual chunks in a single layer on a baking sheet, then transfer to a freezer-safe container for up to 2 months. Thaw in the refrigerator before serving.
- Prepping Ahead: You can prepare the cheesecake filling and crunch topping a day in advance. Assemble and bake just before serving for the freshest taste.
These tips will help maintain the quality and flavor of your dessert, ensuring it remains a hit for days to come.
Conclusion
In summary, Strawberry Crunch Cheesecake Chunks offer a delightful twist on a classic dessert, combining creamy cheesecake with a satisfying crunch. With simple ingredients and straightforward steps, this recipe is perfect for any occasion. We invite you to try this recipe, share your feedback in the comments, and subscribe for more delicious updates!
FAQs
Can I use frozen strawberries?
Yes, you can use frozen strawberries, but make sure to thaw and drain them well to avoid excess moisture in the cheesecake.
How can I make this recipe vegan?
To make a vegan version, substitute cream cheese with a vegan cream cheese alternative, use flax eggs or applesauce instead of eggs, and opt for a plant-based butter for the topping.
Can I make this ahead of time?
Absolutely! You can prepare the cheesecake up to 2 days in advance and store it in the refrigerator until you’re ready to serve.
Strawberry Crunch Cheesecake Chunks
Ingredients
- 1 cup unsalted butter, softened
- 3/4 cup granulated sugar
- 3/4 cup brown sugar, packed
- 1 teaspoon vanilla extract
- 2 large eggs
- 2 1/4 cups all-purpose flour
- 1 teaspoon baking soda
- 1/2 teaspoon salt
- 2 cups semi-sweet chocolate chips
- 1 cup chopped nuts (optional)
Instructions
- Preheat the Oven: Preheat your oven to 375°F (190°C).
- Cream the Butter and Sugars: In a large bowl, beat the softened butter, granulated sugar, brown sugar, and vanilla extract until creamy.
- Add Eggs: Add the eggs one at a time, beating well after each addition.
- Combine Dry Ingredients: In a separate bowl, mix the flour, baking soda, and salt. Gradually add this to the butter mixture, mixing just until combined.
- Stir in Chocolate Chips: Fold in the chocolate chips and nuts if using.
- Scoop the Dough: Drop rounded tablespoons of dough onto ungreased baking sheets, spacing them about 2 inches apart.
- Bake: Bake for 10-12 minutes or until the edges are golden brown. The centers may look slightly underbaked but will firm up as they cool.
- Cool: Allow the cookies to cool on the baking sheet for a few minutes before transferring them to wire racks to cool completely.