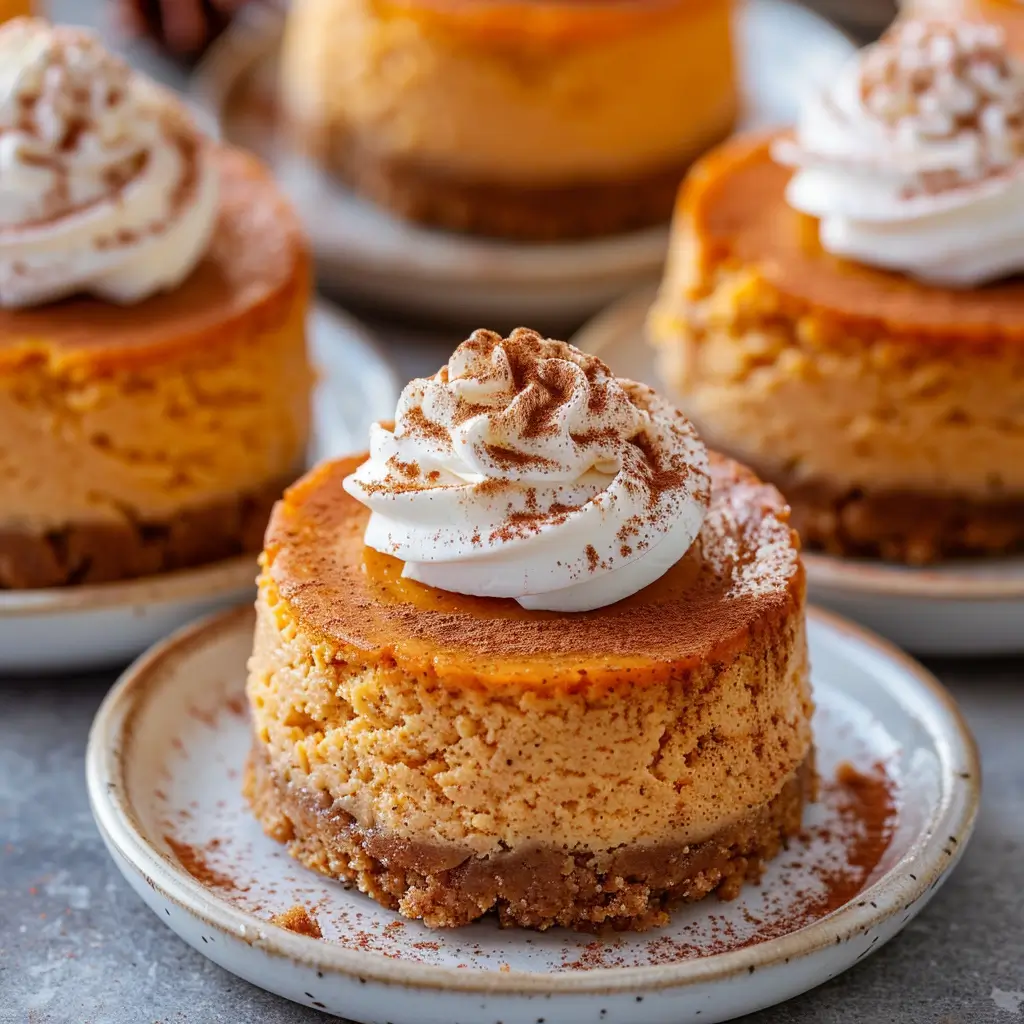
Are you searching for the perfect dessert to celebrate the fall season? Look no further! Mini pumpkin cheesecakes are not only delicious but also an impressive addition to any gathering. Did you know that pumpkin-flavored desserts have seen a 30% increase in popularity over the past five years? This trend highlights the growing love for this seasonal flavor. In this blog post, we’ll explore a delightful mini pumpkin cheesecake recipe that is sure to impress your friends and family.
Ingredients List
To create these delectable mini pumpkin cheesecakes, you will need the following ingredients:
- For the crust:
- 1 cup graham cracker crumbs
- 1/4 cup granulated sugar
- 1/2 cup unsalted butter, melted
- For the filling:
- 16 oz cream cheese, softened
- 1 cup canned pumpkin puree
- 3/4 cup granulated sugar
- 1/2 cup brown sugar
- 3 large eggs
- 1 tsp vanilla extract
- 1 tsp ground cinnamon
- 1/2 tsp ground nutmeg
- 1/4 tsp ground ginger
- 1/4 tsp salt
Substitution Suggestions:
- Graham cracker crumbs: You can use Oreo crumbs or almond flour for a gluten-free option.
- Cream cheese: Neufchâtel cheese can be used for a lighter version.
Step-by-Step Instructions
Step 1: Prepare the Crust
- Preheat your oven to 325°F (163°C).
- In a mixing bowl, combine graham cracker crumbs, granulated sugar, and melted butter. Mix until the crumbs are evenly coated.
- Press the mixture firmly into the bottom of a 12-cup muffin tin lined with cupcake liners.
Step 2: Make the Filling
- In a large mixing bowl, beat the cream cheese until smooth.
- Add the pumpkin puree, granulated sugar, and brown sugar. Mix until well combined.
- Incorporate the eggs, one at a time, followed by the vanilla extract, cinnamon, nutmeg, ginger, and salt. Mix until smooth and creamy.
Step 3: Assemble and Bake
- Pour the filling into each muffin cup over the crust, filling them about 3/4 full.
- Bake for 25 minutes, or until the edges are set but the center is still slightly jiggly.
- Remove from the oven and let cool in the pan for 10 minutes before transferring to a wire rack.
Step 4: Chill
- Refrigerate the mini cheesecakes for at least 2 hours before serving to allow them to set properly.

Nutritional Information
Here’s a breakdown of the nutritional information per serving (one mini cheesecake):
- Calories: 210
- Total Fat: 12g
- Saturated Fat: 7g
- Cholesterol: 60mg
- Sodium: 150mg
- Total Carbohydrates: 24g
- Dietary Fiber: 1g
- Sugars: 12g
- Protein: 3g
Healthier Alternatives for the Recipe
If you’re looking to make your mini pumpkin cheesecakes a bit healthier, consider these modifications:
- Use Greek yogurt instead of cream cheese for a lighter filling.
- Replace granulated sugar with coconut sugar or a sugar substitute like Stevia.
- Add a layer of fruit on top, such as sliced apples or pears, for added nutrients and flavor.
Serving Suggestions
These mini pumpkin cheesecakes are perfect for various occasions! Here are some creative serving suggestions:
- Top with whipped cream and a sprinkle of cinnamon for a classic touch.
- Drizzle with caramel sauce for an indulgent twist.
- Serve alongside a scoop of vanilla ice cream for a delightful contrast in temperatures.
Common Mistakes to Avoid
To ensure your mini pumpkin cheesecakes turn out perfectly, avoid these common pitfalls:
- Overmixing the filling: This can lead to cracks in your cheesecakes. Mix just until combined.
- Skipping the cooling step: Allowing them to cool gradually helps prevent cracks and ensures a smooth texture.
- Not chilling long enough: Patience is key; refrigerate for a minimum of 2 hours for the best results.
Storing Tips for the Recipe
If you have leftovers (though they may not last long!), here’s how to store them properly:
- Refrigeration: Store in an airtight container in the refrigerator for up to 5 days.
- Freezing: For longer storage, freeze them in a single layer on a baking sheet, then transfer to an airtight container for up to 3 months. Thaw in the refrigerator before serving.
Conclusion
In summary, mini pumpkin cheesecakes are a delightful and easy-to-make dessert that captures the essence of fall. With their creamy filling and spiced flavor, they are sure to be a hit at any gathering. We invite you to try this recipe and share your feedback in the comments section below. Don’t forget to subscribe for more delicious updates!
FAQs
Can I make these mini cheesecakes ahead of time?
Yes! These mini pumpkin cheesecakes can be made a day in advance and stored in the refrigerator.
Can I use fresh pumpkin instead of canned?
Absolutely! Just make sure to cook and puree the pumpkin until smooth before using it in the recipe.
How do I know when they are done baking?
The edges should be set, and the center should be slightly jiggly. They will firm up as they cool.

Mini Pumpkin Cheesecake Recipe
Ingredients
- For the crust:
- 1 cup graham cracker crumbs
- 1/4 cup granulated sugar
- 1/2 cup unsalted butter, melted
- For the filling:
- 16 oz cream cheese, softened
- 1 cup canned pumpkin puree
- 3/4 cup granulated sugar
- 1/2 cup brown sugar
- 3 large eggs
- 1 tsp vanilla extract
- 1 tsp ground cinnamon
- 1/2 tsp ground nutmeg
- 1/4 tsp ground ginger
- 1/4 tsp salt
Instructions
Step 1: Prepare the Crust
Preheat your oven to 325°F (163°C).
In a mixing bowl, combine graham cracker crumbs, granulated sugar, and melted butter. Mix until the crumbs are evenly coated.
Press the mixture firmly into the bottom of a 12-cup muffin tin lined with cupcake liners.
Step 2: Make the Filling
In a large mixing bowl, beat the cream cheese until smooth.
Add the pumpkin puree, granulated sugar, and brown sugar. Mix until well combined.
Incorporate the eggs, one at a time, followed by the vanilla extract, cinnamon, nutmeg, ginger, and salt. Mix until smooth and creamy.
Step 3: Assemble and Bake
Pour the filling into each muffin cup over the crust, filling them about 3/4 full.
Bake for 25 minutes, or until the edges are set but the center is still slightly jiggly.
Remove from the oven and let cool in the pan for 10 minutes before transferring to a wire rack.
Step 4: Chill
Refrigerate the mini cheesecakes for at least 2 hours before serving to allow them to set properly.